KubeJS Legacy
This wiki is for KubeJS 1.18.2 and below. That said, this one still has a lot of useful info!
- Intro
- Migrating to KubeJS 6
- Getting Started
- Events
- List of all events
- Custom Items
- EventJS
- Custom Blocks
- CommandEventJS
- TagEventJS
- Loot Table Modification
- RecipeEventJS
- Item Modification
- WorldgenAddEventJS (1.16)
- Block Modification
- JEI Integration
- WorldgenRemoveEventJS (1.16)
- REI Integration
- ItemTooltipEventJS
- Worldgen Events
- Chat Event
- Custom Fluids
- Command Registry
- Datapack Load Events
- Examples
- FTB Quests Integration
- Reflection / Java access
- Painter API
- Units
- Network Packets
- Starting Items
- FTB Utilities Rank Promotions
- Clearlag 1.12
- Scheduled Server Events
- Running Commands
- Spawning Entities
- Classes
- Global
- Other
- Addons
Intro
FAQ
What does this mod do?
This mod lets you create scripts in JavaScript language to manage your server, add new blocks and items, change recipes, add custom handlers for quest mods and more!
How to use it?
Run the game with mod installed once. It should generate kubejs folder in your minecraft directory with example scripts and README.txt. Read that!
Here's a video tutorial for 1.19.2:
I don't know JavaScript
There's examples and pre-made scripts here. And you can always ask in discord support channel for help with scripts, but be specific.
Can I reload scripts?
Yes, use /reload to reload server_scripts/, F3 + T to reload client_scripts/ and /kubejs reload startup_scripts to reload startup_scripts/. If you don't care about reloading recipes but are testing some world interaction event, you can run /kubejs reload server_scripts. Note: Not everything is reloadable. Some things require you to restart game, some only world, some work on fly. Reloading startup scripts is not recommended, but if you only have event listeners, it shouldn't be a problem.
What mod recipes does it support / is mod X supported?
If the mod uses datapack recipes, then it's supported by default. Some more complicated mods require addon mods, but in theory, still would work with datapack recipes. See Recipes section for more info.
What features does this mod have?
The feature list would go here if I actually wrote it. But basically, editing and creating recipes, tags, items, blocks, fluids, worldgen. Listening to chat, block placement, etc. events. Just look at the event list on Wiki.
How does this mod work?
It uses a fork of Rhino, a JavaScript engine by Mozilla to convert JS code to Java classes at runtime. KubeJS wraps minecraft classes and adds utilities to simplify that a lot and remove need for mappings. Architectury lets nearly the same source code be compiled for both Forge and Fabric making porting extremely easy.
Ok, but what if it.. doesn't work?
You can report issues here.
I have more questions/suggestions!
If wiki didn't have the answer for what you were looking for, you can join the Discord server and ask for help on #support channel!

Website: https://kubejs.com/
Source and issue tracker: https://github.com/KubeJS-Mods/KubeJS
Download: https://www.curseforge.com/minecraft/mc-mods/kubejs
Anything below 1.16 is no longer supported!
Migrating to KubeJS 6
This page is still being worked on, so if some info is missing, please check back later!
What's changed in the new KubeJS 6 (1.19.2+)?
onEvent()
onEvent('event', e => {}) syntax was replaced by SomeEventGroup.someEventName(e => {})
// Before
onEvent('block.right_click', e => {
  if(e.block.id === 'minecraft:dirt') console.info('Hi!')
})

// After
BlockEvents.rightClicked(e => {
  if(e.block.id === 'minecraft:dirt') console.info('Hi!')
})
Not only that, but new events also support extra parameters for IDs and other things! You can now choose to make each id have its own event handler:
// Before
onEvent('block.right_click', e => {
  if(e.block.id === 'minecraft:dirt') console.info('Hi!')
  else if(e.block.id === 'minecraft:stone') console.info('Bye!')
})

// After
BlockEvents.rightClicked('minecraft:dirt', e => {
  console.info('Hi!')
})

BlockEvents.rightClicked('minecraft:stone', e => {
  console.info('Bye!')
})
Some events require ID, such as registry and tag events:
// Before
onEvent('item.registry', e => {})

// After
StartupEvents.registry('item', e => {})
// Before
onEvent('tags.items', e => {})
// After
ServerEvents.tags('item', e => {})Using parameters is actually faster on the CPU than checking some event.id == 'id'
You can find the full list of new events here.
onForgeEvent()
onForgeEvent('package.ClassName', e => {}) has been replaced by ForgeEvents.onEvent('package.ClassName', e => {})
// Before
onForgeEvent('net.minecraftforge.event.level.BlockEvent$PortalSpawnEvent', e => {})

// After
ForgeEvents.onEvent('net.minecraftforge.event.level.BlockEvent$PortalSpawnEvent', e => {})
New! It now supports generic events:
ForgeEvents.onGenericEvent('net.minecraftforge.event.AttachCapabilitiesEvent', 'net.minecraft.world.entity.Entity', e => {})Server settings
settings.log... properties have been removed from server scripts, and instead, moved to local/kubejsdev.properties file. By default, it won't be shipped with the pack, but you can change saveDevPropertiesInConfig to true to instead save the file in kubejs/config/dev.properties.
java()
java('package.ClassName') has been replaced by Java.loadClass('package.ClassName')
// Before
const CactusBlock = java('net.minecraft.world.level.block.CactusBlock')

// After
const CactusBlock = Java.loadClass('net.minecraft.world.level.block.CactusBlock')
There might be some more reflective helper methods later in the Java util class, such as listing all fields and methods in a class, etc.
Bye Bye Wrapper classes
None of the vanilla classes are wrappers anymore - EntityJS, LevelJS, ItemStackJS, IngredientJS, and others are gone. This may introduce some bugs, but in general, should make it significantly easier to interact with Minecraft and other mods. Almost all old methods are still supported by core-modding vanilla. This should also significantly boost performance, as it doesn't need to constantly wrap and unwrap classes.
KubeJS 6.1 Update
Other questions
If you have any other questions, feel free to ask them on my Discord Server.
Getting Started
A step by step guide for learning the basics of KubeJS
Introduction and Installation
Installation
Install the mod and its two dependencies Architectury and Rhino.
Make you use the most resent version of each mods for your version.
If you are using 1.16 fabric then use this instead.
When you first install KubeJS, you will need to launch Minecraft with the mods (and the game not crashing) to generate the some folders and files.
The kubejs folder
Finding it
Everything you do in KubeJS in located in the kubejs folder in your instance.
- In PolyMC the file structure will look like
polymc > instances > instance name > minecraft > kubejs - In CurseForge launcher the file structure will look like
curseforge > minecraft > instances > instance name > kubejs - In all of the above cases the
instance nameis the name of the instance - In the normal Minecraft launcher it will be
.minecraft > kubejs, unless you changed the instance folder.
From now on this will be referenced as the kubejs folder.
The contents of it
startup_scripts- Scripts that get loaded once during game startup
- Used for adding items and other things that can only happen while the game is loading
- Can reload code not in an event with
/kubejs reload_startup_scripts - To reload all the code you must restart the game
client_scripts- Scripts that get loaded every time client resources reload
- Used for:
- JEI events
- tooltips
- other client side things
- Can reload code not in an event with
/kubejs reload client_scripts - Can reload all the code in client_scripts with F3+T
server_scripts- Scripts that get loaded every time server resources reload (world load,
/reload) - Used for modifying:
- recipes
- tags
- loot tables
- handling server events
- Can reload code not in an event with
/kubejs reload server_scripts - Can be all the code in server_scripts with
/reload
- Scripts that get loaded every time server resources reload (world load,
exported- Data dumps like texture atlases end up here
config- KubeJS config storage.
- This is also the only directory that scripts can access other than world directory
assets- Acts as a resource pack
- you can put any client resources in here, like:
- textures
- Example: assets/kubejs/textures/item/test_item.png
- models
- lang
- etc.
- textures
- Can be reloaded by pressing F3 + T
- Can reload only the lang files (so faster)
/kubejs reload lang - Read more about it here.
data- Acts as a datapack
- you can put any server resources in here, like:
- loot tables
- Example: data/kubejs/loot_tables/blocks/test_block.json
- functions
- etc
- loot tables
- Can be reloaded with
/reload - Read more about it here.
README.txt- Contains the information here
You can find type-specific logs in logs/kubejs/ directory
Other Useful Tools
Code is just a language that computers can understand. However, the grammar of the language, called syntax for code, is very precise. When you code has a syntactical error, the computer does not know what to do and will probably do something that you do not desire.
With KubeJS we will be writing a lot of code, so it important to avoid these errors. Luckily, there are tools called code editors, that can help us write code correctly.
We recommend installing Visual Studio Code as it is light-ish and has great built in JS support. Now when you edit you java script files, it will not only warn you when you make most syntactical errors, but also help you prevent them in the first place.
Your First Script
Writing Your First Script
If you have launched the game at least once before you will find kubejs/server_scripts/example_server_script.js It looks like this:
// priority: 0

settings.logAddedRecipes = true
settings.logRemovedRecipes = true
settings.logSkippedRecipes = false
settings.logErroringRecipes = true

console.info('Hello, World! (You will see this line every time server resources reload)')

onEvent('recipes', event => {
	// Change recipes here
})

onEvent('item.tags', event => {
	// Get the #forge:cobblestone tag collection and add Diamond Ore to it
	// event.get('forge:cobblestone').add('minecraft:diamond_ore')

	// Get the #forge:cobblestone tag collection and remove Mossy Cobblestone from it
	// event.get('forge:cobblestone').remove('minecraft:mossy_cobblestone')
})
Lets break it down:
- // priority: 0
- Makes it so that if you have multiple server scripts, this script gets loaded first
- If you have only one server_script, this has no effect
- settings.logAddedRecipes = true
settings.logRemovedRecipes = true
settings.logSkippedRecipes = false
settings.logErroringRecipes = true- sets settings for what messages are logged
- You can remove all four of these lines if you want and it will only change what is put into the logs
- console.info('Hello, World! (You will see this line every time server resources reload)')
- Prints the message in the log
- This line is useless other then example and should be removed eventually
- onEvent('recipes', event => {
- This makes an event listener for the
recipesevent, and will run the code inside when and only when therecipesevent is triggered - This is triggered when server resources reload
- Which happens when the world load or the
/reloadcommand is used
- Which happens when the world load or the
- This makes an event listener for the
- // Change recipes here
- comment, an code in a line following
//will be considered a comment and will not be run - Used for taking notes as you write the code
- comment, an code in a line following
- })
- Indicates the end of the 'recipes' event listener
-
onEvent('item.tags', event => {
// Get the #forge:cobblestone tag collection and add Diamond Ore to it
// event.get('forge:cobblestone').add('minecraft:diamond_ore')// Get the #forge:cobblestone tag collection and remove Mossy Cobblestone from it
// event.get('forge:cobblestone').remove('minecraft:mossy_cobblestone')
})- Same thing as the other one but for the
item.tagsevent - You can find the list of all event here
- Same thing as the other one but for the
Finally Writing Code For Real
Lets start off by adding a recipe to craft flint from three gravel.
To do so, insert this code right after the recipes event.
event.shapeless("flint", ["gravel", "gravel", "gravel"])It should look like this:
// priority: 0

settings.logAddedRecipes = true
settings.logRemovedRecipes = true
settings.logSkippedRecipes = false
settings.logErroringRecipes = true

console.info('Hello, World! (You will see this line every time server resources reload)')

onEvent('recipes', event => {
	// Change recipes here
	event.shapeless("flint", ["gravel", "gravel", "gravel"])
})

onEvent('item.tags', event => {
	// Get the #forge:cobblestone tag collection and add Diamond Ore to it
	// event.get('forge:cobblestone').add('minecraft:diamond_ore')

	// Get the #forge:cobblestone tag collection and remove Mossy Cobblestone from it
	// event.get('forge:cobblestone').remove('minecraft:mossy_cobblestone')
})
Now lets test it!
Run the command /reload in game, then try crafting three gravel together in any order.
But how does it work?
- event
- This is a variable that created with the arrow expression in
onEvent('recipes', event => {...- You can have the name be what every you choose, as long as it matches everywhere
- This is a variable that created with the arrow expression in
- .
- The dot operator is used for calling a method of an object
- In this case event is the object and shapeless is the method
- shapeless(
- This is the method that is called by the dot operator on the event
- It is taking two arguments, that being an item result and a array input
- "
- Indicates the start of a string
- flint
- The contents of the string
- You can use
create:flour, if it is from a different mod (flintis the same asminecraft:flint, and both are valid)
- "
- Signifies the end of the string.
- A string is simply a sequence of characters, or letters
- You can read more about strings in JS here.
- ,
- separates different arguments in the method.
- [
- Signifies the start of the array.
- An array holds multiple values or any type, including other arrays.
- You can read more about arrays in JS here.
- "gravel", "gravel", "gravel"
- The contents of the array
- Arrays can hold an indefinite number of elements
- ]
- Closing the array
- )
- Closing the method
There you go! You can make custom shapeless recipes!
If you want to make other types of recipes, learn about it here, and if you have an addon that adds more recipe types, loot at its mod page, or here.
Basics Custom Mechanics
By now you have created a custom recipe, or maybe multiple, or even manipulated tags, or created custom items or blocks.
But you want to do more then that, you want to add a custom mechanic, for example milking a goat.
The first step is to break down your idea into smaller pieces, until each piece is something you can code.
One thing to note, is that most all things are caused by some trigger. Such as an entity dieing, or a block being placed. These are detected by events.
Detecting Events
This is just like when we made recipes, but that time the event was triggered not by a players action, but by the game doing internal operations, that being getting to the time that is for registering recipes.
As a refresher, here is detecting the recipes event:
onEvent('recipes', event => {
	//recipes
})
To change the event detected, we need to change what is in the 's. But to what? Luckily there is a list of all event page in this wiki!
Searching the ID column, we can scroll down and find that there is an event named item.entity_interact which happens to be the one that we want for milking the goat.
Look at the type column and it will tell you which folder, you will need to put you code into.
Now we just put that in there, and we can now run code when a player right clicks an entity.
onEvent('item.entity_interact', event => {
	//code
})
To test we can use Utils.server.tell() to detect when the event occurs.
The are many situations that console.log(), would be better, which put the result in to instance/logs/kubejs/server.txt.
onEvent('item.entity_interact', event => {
	Utils.server.tell("Entity Interation Detected!")
})
Now to test you can try right clicking an entity and see you will see a message appears in the chat.
But this occurs to it entities, and want to only affect what happens to goats.
To do this, we need to know information about the context of the event.
Calling Methods of an Event
Up to this point you may have been wondering what the purpose of the event => { is.
You can recall that for the custom recipe, used it to call the method that added the recipe.
onEvent('recipes', event => {
	event.shapeless('flint', ['gravel', 'gravel', 'gravel'])
}
For each event that we detect the variable event will have different methods. The item.entity_interact event has methods:
.getEntity().getHand().getItem().getTarget()
How are you supposed to know this? Using ProbeJS! There is a whole wiki page about this addon!
So in our code we can write:
onEvent('item.entity_interation', event => {
	event.getTarget()
})
.getEntity() gets the player, while .getTarget() gets the entity
What does this do?
Nothing!
Why?
Because the .getEntity() method does not do anything, but it returns the entity.
To see this we can put it into the chat.
onEvent('item.entity_interation', event => {
	Utils.server.tell( event.getTarget() )
})
Now when you interact with an entity you can see what some details about it!
What is put in the chat is not the actual value is, as only Strings can be displayed. All other types (such as EntityJS) have a toString() method that is called which extracts some information and returns a string that is then displayed instead.
Because of this, you might think what we need to do is run event.getEntity().toString() to get the entity type.
But this is wrong. You should not be using .toString() as there is almost always a better way. In this case its using the method .getType() of entity that returns a string of the type of the entity.
onEvent('item.entity_interation', event => {
	Utils.server.tell( event.getTarget().getType() )
})
This code is good, but it can be better because of a feature called BEANS.
This feature is very simple:
- Methods that start with
getand take no parameters, can be shorted fromfoo.getBar()tofoo.bar - Methods that start with
setand take one parameter, can be shorted fromfoo.setBar("cactus")tofoo.bar = "cactus"
So in our case the code can be shortened to:
onEvent('item.entity_interation', event => {
	Utils.server.tell( event.target.type )
})
Alright, this is all good, but we want to make the code do stuff, not just tell tell us about the entities type. Notably we want to run code if an the type is a certain value.
We do this by using a control structure called: if!
If Statements
The basic syntax is as following:if (condition) {result}
The condition is a boolean, which holds a value: true or false.
And if the boolean equates to true, then the code in result runs, otherwise it does not.
Here is an example:
onEvent('item.entity_interact', event => {
  	Utils.server.tell( event.target.type )
  	if (true) {
    	Utils.server.tell("True")
    }
    if (false) {
    	Utils.server.tell("False")
    }
})
When you interact with an entity in the chat you will be told the True, but not the False.
Lets make this useful, we need to use a condition to run the code based on the entity type.
Testing equality:
//GOOD
"foo" == "foobar" // this is false
"foo" == "foo" // this is true

//BAD
"foo" = "foobar" // a single '=' does assignment (we will get to this later) NOT equality
So our code can look like:
onEvent('item.entity_interact', event => {
  	if (event.target.type == "minecraft:goat") {
    	Utils.server.tell("Is a Goat")
    }
})
Now interacting with a goat will provide the message Is a Goat when interacting with a goat!
Now any code that we want to run when a goat is interacted with, we will place inside of this if statement.
This works, but it can be better.
Something that as you write more code will become increasingly important is code readability. In this case it can be improved with what is know as guard statements. In this case it will look like:
Guard Statements
onEvent('item.entity_interact', event => {
  	if (event.target.type != "minecraft:goat") return
    Utils.server.tell("Is a Goat")
})
This might look more confusing at first but is really quite simple.
Firstly, I am using != instead of ==, which is the same as, except it returns the opposite, so true if they are unequal, and false if they do equal.
Secondly, id you do not include {} then the if will only apply to the next line immediately after, and everything after is considered to be out of the if.
Thirdly, return in this context will end the execution of the code.
So if the entity type is not a goat, then execution will not get passed line 2.
Learn more about ifs here.
The next step is to take a bucket, but before we can do that, we need to ensure the player is holding a bucket.
Getting the item in the players hand
We can use the method .getItem() so event.getItem() which can be beaned to event.item.
Now we get the type of item we can use .getId() so event.item.getId() so event.item.id.
We could use another if, but I want to show you a different option, the OR boolean operator:
true || true // is true
true || false // is true
false || true // is true
false || false // is false

false || false || true || false // is true
false || false || false || false // is false
so we can put this in or code to be:
onEvent('item.entity_interact', event => {
  	if (event.target.type != "minecraft:goat" || event.item.id != "minecraft:bucket") return
    Utils.server.tell("Is a Goat and is Holding a Bucket")
})
This should say in the chat Is a Goat and is Holding a Bucket if you right click a goat with a bucket
Now to take the item, we will manipulate the count of it. We can get the count of the item, subtract one from it, then set the count to the result.
.getCount()- get the count of an item
.setCount()- sets the count of an item
We can write the code:
onEvent('item.entity_interact', event => {
  	if (event.target.type != "minecraft:goat" || event.item.id != "minecraft:bucket") return
    Utils.server.tell("Is a Goat and is Holding a Bucket")

  	event.item.setCount( event.item.getCount() - 1)
})
Now we bean it to:
onEvent('item.entity_interact', event => {
  	if (event.target.type != "minecraft:goat" || event.item.id != "minecraft:bucket") return
    Utils.server.tell("Is a Goat and is Holding a Bucket")

  	event.item.count = event.item.count - 1
})
But there is a better way to write this using something know as syntactical sugar. This is just a fancy term for using symbols in a special order that lets you write a piece of code with less total characters to do a different thing with under the hood.
In the example above we used the basic assignment operator =.
But there are other assignment operators! Such as the subtraction assignment operator -=.
Here is it in the code:
onEvent('item.entity_interact', event => {
  	if (event.target.type != "minecraft:goat" || event.item.id != "minecraft:bucket") return
    Utils.server.tell("Is a Goat and is Holding a Bucket")

  	event.item.count -= 1
})
Instead of getting the value, then subtracting one, it can now be thought of as simply reducing the value by 1.
There are other assignment operators, such as one for addition, +=, multiplication, *=, division, /=, modulo, %=, logical or ||=, logical and, &&==, bitwise xor, ^=, bitwise and, &=, bitwise or, |=, left bitshift, <<=, right bitshift, >>>=, signed right bitshift >>=, and of course minus, -=
But wait, there's more! For adding or subtracting by 1, you can make the code even smaller, appending ++ or -- to then end.
onEvent('item.entity_interact', event => {
  	if (event.target.type != "minecraft:goat" || event.item.id != "minecraft:bucket") return
    Utils.server.tell("Is a Goat and is Holding a Bucket")

  	event.item.count--
})
Epic, we made it smaller! None of that was required, but it looks a lot nicer.
Giving the Player Items
We can go quick cause we know all the steps for all that is left.
event.getPlayer() for player but event.player because of beans. Player has a method called .give(ItemStack) to give an item so event.player.give(ItemStack). And in our case ItemStackJS is 'milk_bucket'. So our final code:
onEvent('item.entity_interact', event => {
  	if (event.target.type != "minecraft:goat" || event.item.id != "minecraft:bucket") return
    Utils.server.tell("Is a Goat and is Holding a Bucket")

  	event.item.count--

  	event.player.give('milk_bucket')
})
Now we can remove the debugging line Utils.server.tell("Is a Goat and is Holding a Bucket").
onEvent('item.entity_interact', event => {
  	if (event.target.type != "minecraft:goat" || event.item.id != "minecraft:bucket") return
  	event.item.count--
  	event.player.give('milk_bucket')
})
When holding a stack of buckets and right clicking a goat, a bucket will be consumed and you gain a milk bucket.
It seem good. Right? All done. Wrong!
When programming, you always have to be careful about edge-cases. These are situations that are typically at extremes on situations. For example you write some code to function differently if you have 5 or more levels, but when you have 5 levels exactly, some logic differently causing an expected result.
Our code currently mishandles an edge case. The edge case is when the player has one bucket in their hand.
When holding one bucket in your hand, not in the first slot, and with nothing else in the first slot. When right-clicking a goat the milk bucket does not stay in your hand as is intuitive, but instead get placed in the first slot.
To resolve this bug, we could add an if to check if the count is one, then change the logic, but this is not required because their is method that does everything for us. The method .giveInHand() is identical to the .give() except it first attempts to put the item in the players hand if it is empty.
Putting this in our code looks like:
onEvent('item.entity_interact', event => {
  	if (event.target.type != "minecraft:goat" || event.item.id != "minecraft:bucket") return
  	event.item.count--
  	event.player.giveInHand('milk_bucket')
})
Now it seems like we are done! But compare with milking a cow, its just not as satisfying.
Adding Sound
Although adding feedback in to you creations, usually in the form of sound effects, and particles, does not change the effect or your creation, it has a major effect on how engaging, polished, and interesting your creation appears.
Luckily playing sound is really easy with KubeJS, because many different classes have a .playSound() method.
We want the sound to originate from the goat being milked so we can use event.target to get the goat, then just call .playSound().
.playSound() takes some parameters:
Either the id of the sound, or the id, the volume, and the pitch.
Lets keep thing simple by only using the id.
Although you can register new sounds with KubeJS, it would be easier to use the existing cow milking sound. The id of this sound is entity.cow.milk.
Putting this into the code looks like:
onEvent('item.entity_interact', event => {
  	if (event.target.type != "minecraft:goat" || event.item.id != "minecraft:bucket") return
  	event.item.count--
  	event.player.giveInHand('milk_bucket')
  	event.target.playSound('entity.cow.milk')
})
Now when milking a goat, you hear the milking sound.
There we go! We are done!
Recap
Now that we implemented a feature together you will be able to make some of your own basic custom features too!
Don't be too intimidated by how long it took us, we went through every single detail, but you already know those so it will take you a fraction of the time it took to make this.
Here is a step by step list of how you can make your own mechanic:
- Determine what triggers the mechanic.
- This is the event.
- In this example we did
item.entity_interact. - A list of all events is here.
- Narrow down when the code of you event runs with guard statements.
- Use an if and return.
- In our case it is detecting the entity as a goat and the item as a bucket.
- Use ProbeJS or the second wiki or the source code to get the information you need.
- Break down what you want to do as code you can write.
- In our case instead of the idea of filling a bucket with milk, the code takes one of the item and give the player a bucket of milk.
- Use ProbeJS or the second wiki or the source code to get the information you need.
- Double check edge cases.
- You should be always testing you code with most every change you make.
- You need to be extra careful with edge cases, when making changes too.
- In our case we replaced
player.give()withplayer.giveInHand().
- Add Polish.
- This includes fixing minor bugs on edge cases.
- This also involves making sure the player gets feedback such as sound or particles.
- In our case this is the milking sound.
Other Helpful Things to Know
Although we did not get to it with the example, here are some simple things that would be helpful to know:
- Cancelling events:
- Sometimes you want the default action of an event to not occur.
- An example is maybe if you wanted to add milking of horses.
- There already is an interaction for right clicking horses, getting on them.
- The player would both milk and be put on the horse if the event is not canceled.
- The syntax is
event.cancel().- You can place it anywhere in your code and the effect will be the same, the default action will not occur.
- Only some events are cancel-able.
- The non-cancel-able events are listed in the list of all events.
- You can tell if an event is cancel-able with
event.isCancelable().
- Some events are partly cancel-able.
- They are listed as cancel-able, but don't completely undo the default action.
- For example entity.death event, canceling it will not prevent the entity from dying, but will prevent loot, and statistics.
- While loops
- They syntax is the same as an if.
- The function is the same, except the code inside of the loop will repeat until the condition becomes false.
- Learn more here.
- Variables
- Using
let foo = barwill make a variable named foo and set it to the contents of bar.- To change the value of foo later use
foo = bariffoois already made.
- To change the value of foo later use
- A common use is to reduce repeated code.
- So in our example we could have placed
let t = event.targetat the beginning. - Then every use of
event.targetcould have been replaced with t soevent.target.typebecomet.type.
- So in our example we could have placed
- Variables massively increase what is possible, and as begin to reveal a lot more hidden complexities (such as scope, reference vs value and more) that we not gonna get into right now.
- Learn more here.
- Using
Using ProbeJS
ProbeJS is an add-on that is built exclusively to help you program.
What it does:
It generates documentation files from digging around in the game code itself. So, you get all the methods, not only from KubeJS, but also from base Minecraft, no matter they're added by modloader, or from the other mods you install. Not only can you view these docs, but they are also formatted in a way that a sufficiently advanced code editor, like VSCode, can understand. So, you will now get more relevant code suggestions too.
Installation:
Find ProbeJS on the 3rd Party addons list and download the relevant version for you.
Once you've installed it and relaunched your game, run the command /probejs dump.
Now you will need to wait a little while, but after some time, you should see a message alerting you that the dump is complete.
What just happened?
You can now look and see that there is a new folder located at instance/kubejs/probe/ and inside of here there are a more folders and files. These are your docs.
Setting up VS Code
- In VS Code select
file > open folder - This opens up a file explore window, select the KubeJS folder (
instance/) and choose select folder.
You're done!
Troubleshooting
For many people, autocompletions won't be popped up as they type. You need to configure your VSCode to setup a valid JavaScript IDE so you can get 100% power of ProbeJS!
No Intellisense at All
For some reason, VSCode downloaded by some people are not having builtin JavaScript/TypeScript support. To check if you have such support enabled, search @builtin JavaScript in the extension tab in your VSCode, you should see a plugin named TypeScript and JavaScript Language Features, that's the builtin extension for VSCode to support JS/TS.
If not, then you'll have to install the JavaScript and TypeScript Nightly to get JS/TS support.
Downloading Intellisense Models
If your ISP is weird, downloading Intellisense models for enabling support can take a long time. You can consider switch to proxy or some other methods to change your Internet environment, maybe even changing a WiFi can work. If not, then sorry, it's an Internet problem, there's no way to solve it on VSCode's end.
Too Many Mods
Completion takes a significant amount of performance. You can't expect VSCode to run super-fast on some ATM8-like modpacks, that's not possible.
For less than 150 mods, VSCode should run at a decent speed, for more than 300 mods, completions are taking >10s since now VSCode need to examine over 100k item/block/entity entries before telling you what to type next.
Usage
Properties and Methods of a Class
To know the methods of a class just type in the class name, like Item or BlockProperties, then type a . now you will see a list of the public methods and properties.
ProbeJS will display the beaned accessors and mutators. However, due to the limitation of JavaScript syntax, if there's a method having same name with a field/bean, then the name will always be resolved to the method.
Type Checking and JSDoc
To add type checking for extra safety when coding JavaScript, add //@ts-check to the first line of a JS file, then you will have VSCode guarding your types for the rest of the file. It's extremely useful when you're working with some dangerous code which is likely to crash the game if you have a mistake in type.
Sometimes, due to limitations of TypeScript, you might need to persuade VSCode to skip checking for some part of your code. Adding //@ts-ignore would help you to do that.
Or maybe you want to tell VSCode: "This should be a list of item names!", or "This method should have ... as params, and ... as return types!". Then you can add JSDoc to tell VSCode to do that:
/**
 * @type {Special.Item[]}
 */
let consumableItems = []

ServerEvents.recipes(event => {
	/**
	 *
	 * @param {Internal.Ingredient_} input
	 * @param {Internal.ItemStack_} output
	 * @returns {Internal.ShapedRecipeJS}
	 */
	let make3x3Recipe = (input, output) => {
		return event.recipes.minecraft.crafting_shaped(output, ["SSS", "SSS", "SSS"], { S: input })
	}
})
Sometimes, if with //@ts-check enabled, you will need to add //@ts-ignore to calm VSCode to accept your docs.
Searching by Keyword
If you are in VSCode press the explorer button in the top-ish left to open up the explorer pane.
Tips
If you append class to the front and to the end then you will look for classes so like Item has 8635 results for me, but if I type class Item then the one I want!
In events.d.ts you will find events but only basic information about them.
In constants.d.ts you can see different pieces that you can use whereever.
If you want to find the methods of an event, say item.pickup find it in one of the files (In this case events.documented.d.ts) and here is the line describing it:
declare function onEvent(name: 'item.pickup', handler: (event: Internal.ItemPickupEventJS) => void)Look closely and find Internal.ItemPickupEventJS. Since it says Internal, we will look in the the globals.d.ts file, but if it says Registry then we use registries.d.ts.
Now we will go to the generated file and search ItemPickupEventJS.
Then we find:
/**
* Fired when an item is about to be picked up by the player.
* @javaClass dev.latvian.mods.kubejs.item.ItemPickupEventJS
*/
class ItemPickupEventJS extends Internal.PlayerEventJS {
    getItem(): Internal.ItemStackJS;
    getEntity(): Internal.EntityJS;
    getItemEntity(): Internal.EntityJS;
    canCancel(): boolean;
    get item(): Internal.ItemStackJS;
    get itemEntity(): Internal.EntityJS;
    get entity(): Internal.EntityJS;
    /**
    * Internal constructor, this means that it's not valid unless you use `java()`.
    */
    constructor(player: Internal.Player, entity: Internal.ItemEntity, stack: Internal.ItemStack);
}
This means that we can use the methods .getItem() .getEntity() .getItemEntity() .canCancel() .item .itemEntity and .entity.
But if we did potion.registry then we get Registry.Potion which brings us to:
class Potion extends Internal.RegistryObjectBuilderTypes$RegistryEventJS<any> {
	create(id: string, type: "basic"): Internal.PotionBuilder;
	create(id: string): Internal.PotionBuilder;
}
So we can use event.create('cactus_juice') but that does not do much so we need to follow one step further and go to the potion builder, which you see is Internal.PotionBuilder. Now we search PotionBuilder in globals.d.ts then we see:
/**
* @javaClass dev.latvian.mods.kubejs.misc.PotionBuilder
*/
class PotionBuilder extends Internal.BuilderBase<Internal.Potion> {
    getRegistryType(): Internal.RegistryObjectBuilderTypes<Internal.Potion>;
    effect(effect: Internal.MobEffect_, duration: number, amplifier: number, ambient: boolean, visible: boolean): this;
    effect(effect: Internal.MobEffect_, duration: number, amplifier: number, ambient: boolean, visible: boolean, showIcon: boolean): this;
    effect(effect: Internal.MobEffect_, duration: number, amplifier: number, ambient: boolean, visible: boolean, showIcon: boolean, hiddenEffect: Internal.MobEffectInstance_): this;
    effect(effect: Internal.MobEffect_, duration: number): this;
    effect(effect: Internal.MobEffect_, duration: number, amplifier: number): this;
    effect(effect: Internal.MobEffect_): this;
    addEffect(effect: Internal.MobEffectInstance_): this;
    createObject(): Internal.Potion;
    get registryType(): Internal.RegistryObjectBuilderTypes<Internal.Potion>;
    /**
    * Internal constructor, this means that it's not valid unless you use `java()`.
    */
    constructor(i: ResourceLocation);
}
Now we see the methods that we can call after this.
So in our code we could write:
onEvent('potion.registry', event => {
  	event.create('cactus_juice').effect('speed', 10, 5)
})
Events
Events that get fired during game to control recipes, world, etc.
List of all events
This is a list of all events. It's possible that not all events are listed here, but this list will be updated regularly.
Click on event ID to open it's class and see information, fields and methods.
Type descriptions:
- Startup: Scripts go in kubejs/startup_scripts folder.
- Server: Scripts go in kubejs/server_scripts folder. Will be reloaded when you run /reload command.
- Server Startup: Same as Server, and the event will be fired at least once when server loads.
- Client: Scripts go in kubejs/client_scripts folder. Currently only reloaded if you have KubeJS UI installed in you run Ctrl+F5 in a menu.
- Client Startup: Same as Client, and the event will be fired at least once when client loads.
| ID | Cancellable | Type | Note |
|---|---|---|---|
| init | No | Startup | |
| postinit | No | Startup | |
| loaded | No | Startup | |
| command.registry | No | Server | |
| command.run | Yes | Server | |
| client.init | No | Client | |
| client.debug_info.left | No | Client | |
| client.debug_info.right | No | Client | |
| client.generate_assets | No | Client | |
| client.logged_in | No | Client | |
| client.logged_out | No | Client | |
| client.tick | No | Client | |
| server.load | No | Server | |
| server.unload | No | Server | |
| server.tick | No | Server | |
| server.datapack.first | No | Server | |
| server.datapack.last | No | Server | |
| recipes | No | Server | |
| recipes.after_load | No | Server | Does not work 1.18+ |
| level.load | No | Server | Replace level with world in 1.16 |
| level.unload | No | Server | Replace level with world in 1.16 |
| level.tick | No | Server | Replace level with world in 1.16 |
| level.explosion.pre | Yes | Server | Replace level with world in 1.16 |
| level.explosion.post | No | Server | Replace level with world in 1.16 |
| player.logged_in | No | Server | |
| player.logged_out | No | Server | |
| player.tick | No | Server | |
| player.data_from_server. | Yes | Client | |
| player.data_from_client. | Yes | Server | |
| player.chat | Yes | Server | |
| player.advancement | No | Server | |
| player.inventory.opened | No | Server | |
| player.inventory.closed | No | Server | |
| player.inventory.changed | No | Server | |
| player.chest.opened | No | Server | |
| player.chest.closed | No | Server | |
| entity.death | Yes | Server | |
| entity.attack | Yes | Server | |
| entity.drops | Yes | Server | |
| entity.check_spawn | Yes | Server | |
| entity.spawned | Yes | Server | |
| block.registry | No | Startup | |
| block.missing_mappings | No | Server | |
| block.tags | No | Server | |
| block.right_click | Yes | Server | |
| block.left_click | Yes | Server | |
| block.place | Yes | Server | |
| block.break | Yes | Server | |
| block.drops | No | Server | |
| item.registry | No | Startup | |
| item.missing_mappings | No | Server | |
| item.tags | No | Server | |
| item.right_click | Yes | Server | |
| item.right_click_empty | No | Server | |
| item.left_click | No | Server | |
| item.entity_interact | Yes | Server | |
| item.modification | No | Startup | |
| item.pickup | Yes | Server | |
| item.tooltip | No | Client | |
| item.toss | Yes | Server | |
| item.crafted | No | Server | |
| item.smelted | No | Server | |
| fluid.registry | No | Startup | |
| fluid.tags | No | Server | |
| entity_type.tags | No | Server | |
| worldgen.add | No | Startup | |
| worldgen.remove | No | Startup |
Custom Items
This is a startup_scripts/ event
// Listen to item registry event
onEvent('item.registry', event => {

  // The texture for this item has to be placed in kubejs/assets/kubejs/textures/item/test_item.png
  // If you want a custom item model, you can create one in Blockbench and put it in kubejs/assets/kubejs/models/item/test_item.json
  event.create('test_item')

  // You can chain builder methods as much as you like
  event.create('test_item_2').maxStackSize(16).glow(true)

  // You can specify item type as 2nd argument in create(), some types have different available methods
  event.create('custom_sword', 'sword').tier('diamond').attackDamageBaseline(10.0)
})
Valid item types:
- "basic"
- default
- "sword"
- "pickaxe"
- "axe"
- "shovel"
- "hoe"
- "helmet"
- "chestplate"
- "leggings"
- "boots"
Other methods item builder supports:
You can chain these methods after create()
Anything with a ??? may not be completely accurate
Physical Properties
- maxStackSize(size)
- unstackable()
- Identical to maxStackSize(1)
- maxDamage(damage)
- ie max durability of the item
- burnTime(ticks)
- In a furnace
- fireResistant(true/false)
Non-Model Visual Stuff
- rarity('rarity')
- Options are:
- "common"
- "uncommon"
- "rare"
- "epic"
- Options are:
- glow(true/false)
- tooltip(text...)
- The text under the item name to provide details about it
- color(index, colorHex)
- If you do not have a custom model, index is 0
- If you do have a custom model, then index is the layer hat you want to affect
- there is an example below
- color((item, number) => {...})
- any code you want
- must return a color
- there is an example below
- ???
- displayName(name)
- name(item => {...})
- you can put whatever code in there you want
- must return a string
- ???
- translationKey(key)
- ???
- You don't need this unless you know what you are doing
Model Editing
- textureJson(json)
- for example {layer0:"minecraft:item/sand",layer1:"minecraft:item/paper"}
- The contents of the texture part of item model
- ???
- modelJson(json)
- the entire json that you would put for a item model, you can just put in here
- ???
- parentModel(modelName)
- Set the "parent" property of this items model to modelName
- texture(customTexturePath)
- for example "minecraft:item/feather"
- texture(key, customTexturePath)
- if key is "layer0", then its the same as texture(customTexturePath)
- ???
Bar
There an example farther below
- barColor((item) => {...})
- must return a color
- any code you want
- ???
- must return a color
- barWidth(width)
- ???
Custom Uses
The is a section below for an example
- useAnimation(animation)
- Can be:
- "spear"
- trident
- "crossbow"
- "eat"
- food
- "spyglass"
- "block"
- "none"
- "bow"
- "drink"
- "spear"
- ???
- Can be:
- useDuration(itemstack => {...})
- any code you want
- for example useDuration(itemstack => 60)
- three seconds
- must return a whole number
- if you want something that does not end on its own, then use something like 72000 (an hour)
- ???
- any code you want
- use((level, player, hand) => {...})
- for example use(() => true)
- any code you want
- item is usable if it is true
- must return a boolean
- ???
- finishUsing((itemstack, level, entity) => {...})
- any code you want
- when the duration completes
- ???
- releaseUsing((itemstack, level, entity, tick) => {...})
- any code you want
- when released before the duration completes
- ???
Miscellaneous
- type(type)
- for 1.16
- tag(resourceLocation)
- ???
- tool(type, level)
- for 1.16
- modifyAttribute(attribute, identifier, d, operation)
- ???
- group(group_id)
- Creative mode tab
- Vanilla tabs are:
- "search"
- "buildingBlocks"
- "decorations"
- "redstone"
- "transportation"
- "misc"
- "food"
- "tools"
- "combat"
- "brewing"
- containerItem(id)
- A item to reference properties of
- ???
- subtypes(item => {...})
- must return a itemstack collection
- This is for making JEI or creative menu have the same item multiple times with different NBT
- any code you want
- ???
- food(foodBuilder => {...})
Tool
Methods available if you use 'sword', 'pickaxe', 'axe', 'shovel' or 'hoe' type:
- tier(toolTier)
- Can be:
- "wood"
- "stone"
- "iron"
- "gold"
- "diamond"
- "netherite"
- Can be:
- modifyTier(tier => ...)
- Same syntax as custom tool tier, see below
- attackDamageBaseline(damage)
- You only want to modify this if you are creating a custom weapon such as Spear, Battleaxe, etc.
- attackDamageBonus(damage)
- speedBaseline(speed)
- Same as attackDamageBaseline, only modify for custom weapon types
- speed(speed)
Armor
Methods available if you use 'helmet', 'chestplate', 'leggings' or 'boots' type:
- tier('armorTier')
- Can be:
- "leather"
- "chainmail"
- "iron"
- "gold"
- "diamond"
- "turtle"
- "netherite"
- Can be:
- modifyTier(tier => ...) // Same syntax as custom armor tier, see below
Creating custom tool and armor tiers
All values are optional and by default are based on iron tier
onEvent('item.registry.tool_tiers', event => {
  event.add('tier_id', tier => {
    tier.uses = 250
    tier.speed = 6.0
    tier.attackDamageBonus = 2.0
    tier.level = 2
    tier.enchantmentValue = 14
    tier.repairIngredient = '#forge:ingots/iron'
  })
})
onEvent('item.registry.armor_tiers', event => {
// Slot indicies are [FEET, LEGS, BODY, HEAD]
event.add('tier_id', tier => {
tier.durabilityMultiplier = 15 // Each slot will be multiplied with [13, 15, 16, 11]
tier.slotProtections = [2, 5, 6, 2]
tier.enchantmentValue = 9
tier.equipSound = 'minecraft:item.armor.equip_iron'
tier.repairIngredient = '#forge:ingots/iron'
tier.toughness = 0.0 // diamond has 2.0, netherite 3.0
tier.knockbackResistance = 0.0
})
})Examples:
Custom Foods
These methods are each optional, and you may include as many or as few as you like.
onEvent('item.registry', event => {
	event.create('magic_steak').food(food => {
		food
    		.hunger(6)
    		.saturation(6)//This value does not directly translate to saturation points gained
      		//The real value can be assumed to be:
      		//min(hunger * saturation * 2 + saturation, foodAmountAfterEating)
      		.effect('speed', 600, 0, 1)
      		.removeEffect('poison')
      		.alwaysEdible()//Like golden apples
      		.fastToEat()//Like dried kelp
      		.meat()//Dogs are willing to eat it
      		.eaten(ctx => {//runs code upon consumption
        		ctx.player.tell('Yummy Yummy!')
          		//If you want to modify this code then you need to restart the game.
          		//However, if you make this code call a global startup function
          		//and place the function *outside* of an 'onEvent'
          		//then you may use the command:
          		//  /kubejs reload startup_scripts
          		//to reload the function instantly.
        	})
	})
})
Custom Uses
onEvent("item.registry", event => {
event.create("nuke_soda", "basic")
        .tooltip("§5Taste of Explosion!")
        .tooltip("§c...Inappropriate intake may cause disastrous result.")
        /**
         * The use animation of the item, can be  "spear" (trident),
         * "crossbow", "eat" (food), "spyglass", "block", "none", "bow", "drink"
         * When using certain animations, corresponding sound will be played.
         */
        .useAnimation("drink")
        /**
         * The duration before the item finishs its using,
         * if you need something like hold-and-charge time (like bow),
         * consider set this to 72000 (1h) or more.
         * A returned value of 0 or lower will render the item not usable.
         */
        .useDuration((itemstack) => 64)
        /**
         * When item is about to be used.
         * If true, item will starts it use animation if duration > 0.
         */
        .use((level, player, hand) => true)
        /**
         * When the item use duration expires.
         */
        .finishUsing((itemstack, level, entity) => {
            let effects = entity.potionEffects;
            effects.add("haste", 120 * 20)
            itemstack.itemStack.shrink(1)
            if (entity.player) {
                entity.minecraftPlayer.addItem(Item.of("minecraft:glass_bottle").itemStack)
            }
            return itemstack;
        })
        /**
         * When the duration is not expired yet, but
         * players release their right button.
         * Tick is how many ticks remained for player to finish using the item.
         */
        .releaseUsing((itemstack, level, entity, tick) => {
            itemstack.itemStack.shrink(1)
            level.createExplosion(entity.x, entity.y, entity.z).explode()
        })
})
Bar
event.create("hammer")
        //Determine how long the bar is, should be an integer between 0 (empty) and 13 (full)
        //If the value is below 0, it will be treated as 0.
        //The value is capped at 13, any value over 13 will be considered "full", thus making it not shown
        .barWidth(i => i.nbt.contains("hit_count") ? i.nbt.getInt("hit_count") / 13.0 : 0)
        //Determine what color should the bar be.
        .barColor(i => Color.AQUA)
Dynamic Tinting and Model Stuff
onEvent("item.registry", (event) => {
	/**
	 * Old style with just setting color by index still works!
	 */
	event
		.create("old_color_by_index")
		.textureJson({
			layer0: "minecraft:item/paper",
			layer1: "minecraft:item/ghast_tear",
		})
		.color(0, "#70F00F")
		.color(1, "#00FFF0");

	event
		.create("cooler_sword", "sword")
		.displayName("Test Cooler Sword")
		.texture("minecraft:item/iron_sword")
		.color((itemstack) => {
			/**
			 * Example by storing the color in the nbt of the itemstack
			 * You have to return -1 to apply no tint.
			 *
			 * U can test this through: /give @p kubejs:cooler_sword{color:"#ff0000"}
			 */
			if (itemstack.nbt && itemstack.nbt.color) {
				return itemstack.nbt.color;
			}

			return -1;
		});

	event
		.create("test_item")
		.displayName("Test Item")
		.textureJson({
			layer0: "minecraft:item/beef",
			layer1: "minecraft:item/ghast_tear",
		})
		.color((itemstack, tintIndex) => {
			/**
			 * If you want to apply the color to a specific layer, you can use the tintIndex
			 * tintIndex is the texture layer index from the model: layer0 -> 0, layer1 -> 1, etc.
			 * U can use the `Color` wrapper for some default colors
			 *
			 * This example will apply the color to the ghast_tear texture.
			 */
			if (tintIndex == 1) {
				return Color.BLUE;
			}
			return -1;
		});

	/**
	 * Set a texture for a specific layer
	 */
	event.create("test_sword", "sword").displayName("Test Sword").texture("layer0", "minecraft:item/bell");

	/**
	 * Directly set your custom model json
	 */
	event.create("test_something").displayName("Test something").modelJson({
		parent: "minecraft:block/anvil",
	});
});EventJS
This event is the most basic event class, parent of all other events.
Parent class
Can be cancelled
No
Variables and Functions
| Name | Return Type | Info |
| cancel() | void | Cancels event. If the event can't be cancelled, it won't do anything. |
Custom Blocks
This is a startup script.
onEvent('block.registry', event => {
  event.create('test_block')
  	   .material('glass')
       .hardness(0.5)
       .displayName('Test Block') // No longer required in 1.18.2+
       .tagBlock('minecraft:mineable/shovel') // Make it mine faster using a shovel in 1.18.2+
  	   .tagBlock('minecraft:needs_iron_tool') // Make it require an iron or higher level tool on 1.18.2+
  	   .requiresTool(true) // Make it require a tool to drop ay loot

  // Block with custom type (see below for list of types for 1.18 (use .type for 1.16))
  event.create('test_block_slab', 'slab').material('glass').hardness(0.5)


  //uses a combo of properties (things you might consider blockstate) and random tick to make the block eventually change to test_block, but only progresses if waterlogged
  event.create('test_block_2').material('glass').hardness(0.2).property(BlockProperties.WATERLOGGED).property(BlockProperties.AGE_7).randomTick(tick => {
    const block = tick.block
    const properties = block.properties
    const age = Number(properties.age)
    if (properties.waterlogged == 'false') return
    if (age == 7) {
      block.set('kubejs:test_block')
    } else {
      block.set('kubejs:test_block_2',{waterlogged:'true',age:`${age+1}`})
  })
})
The texture for this block has to be placed in kubejs/assets/kubejs/textures/block/test_block.png.
If you want a custom block model, you can create one in Blockbench and put it in kubejs/assets/kubejs/models/block/test_block.json.
List of available materials - to change break/walk sounds and to change some properties.
| Materials (1.18.2) |
| air |
| wood |
| stone |
| metal |
| grass |
|
dirt |
| water |
| lava |
| leaves |
| plant |
| sponge |
| wool |
| sand |
| glass |
| explosive |
| ice |
| snow |
| clay |
| vegetable |
| dragon_egg |
| portal |
| cake |
| web |
| slime |
| honey |
| berry_bush |
| lantern |
Other methods block builder supports:
- displayName('name')
- Not required for 1.18.2+
- material('material')
- See list above
- type('basic')
- See available types below.
- Do not use for 1.18.2, use the syntax in the second example above
- hardness(float)
- >= 0.0
- resistance(float)
- >= 0.0
- unbreakable()
- Sets the resistance to MAX_VALUE and hardness to -1, like bedrock
- lightLevel(int)
- 0.0 - 1.0
- harvestTool('tool', level)
- Available tools: pickaxe, axe, hoe, shovel
- level >= 0
- Not used in 1.18.2+, see tag in example above
- opaque(boolean)
- fullBlock(boolean)
- requiresTool(boolean)
- renderType('type')
- Available types: solid, cutout, translucent
- cutout required for blocks with texture like glass
- translucent required for blocks like stained glass
- color(tintindex, color)
- textureAll('texturepath')
- texture('side', 'texturepath')
- model('modelpath')
- noItem()
- box(x0, y0, z0, x1, y1, z1, true)
- 0.0 - 16.0
- default is (0,0,0,16,16,16, true)
- box(x0, y0, z0, x1, y1, z1, false)
- Same as above, but in 0.0 - 1.0 scale
- default is (0,0,0,1,1,1, false)
- noCollision()
- notSolid()
- waterlogged()
- noDrops()
- slipperiness(float)
- speedFactor(float)
- jumpFactor(float)
- randomTick(randomTickEvent => {})
- see below
- item(itemBuilder => {})
- setLootTableJson(json)
- setBlockstateJson(json)
- setModelJson(json)
- noValidSpawns(boolean)
- suffocating(boolean)
- viewBlocking(boolean)
- redstoneConductor(boolean)
- transparent(boolean)
- defaultCutout()
- batches a bunch of methods to make blocks such as glass
- defaultTranslucent()
- similar to defaultCutout() but using translucent layer instead
- tagBlock('forge:something')
- adds a block tag
- tagItem('forge:something_better')
- adds an item tag
- tagBoth('forge:something')
- adds both block and item tag
- property(BlockProperty)
- See example above, but adds in more "blockstates" to the block
- Example: BlockProperties.WATERLOGGED
- You can add as many or few as you desire
RandomTickEvent callback properties
- BlockContainerJS block
- Random random
- LevelJS level
- ServerJS server
Block Properties
The default 1.18 properties are:
- "MAX_RESPAWN_ANCHOR_CHARGES"
- "BAMBOO_LEAVES"
- "HANGING"
- "WEST_WALL"
- "BOTTOM"
- "EYE"
- "HALF"
- "DRAG"
- "MAX_ROTATIONS_16"
- "SOUTH"
- "MIN_RESPAWN_ANCHOR_CHARGES"
- "DISTANCE"
- "LOCKED"
- "EXTENDED"
- "SCULK_SENSOR_PHASE"
- "LEVEL"
- "DOOR_HINGE"
- "STAIRS_SHAPE"
- "EGGS"
- "LAYERS"
- "CONDITIONAL"
- "EAST_WALL"
- "HATCH"
- "ORIENTATION"
- "LEVEL_CAULDRON"
- "RAIL_SHAPE_STRAIGHT"
- "SIGNAL_FIRE"
- "STRUCTUREBLOCK_MODE"
- "PISTON_TYPE"
- "MIN_LEVEL"
- "HAS_BOOK"
- "ATTACH_FACE"
- "WATERLOGGED"
- "FALLING"
- "AGE_25"
- "TRIGGERED"
- "MAX_LEVEL_8"
- "UNSTABLE"
- "CHEST_TYPE"
- "AGE_5"
- "SOUTH_WALL"
- "AGE_7"
- "STABILITY_MAX_DISTANCE"
- "BELL_ATTACHMENT"
- "AGE_1"
- "MAX_LEVEL_3"
- "ATTACHED"
- "AGE_3"
- "STAGE"
- "AGE_2"
- "POWER"
- "MAX_DISTANCE"
- "HAS_BOTTLE_1"
- "HAS_BOTTLE_0"
- "PICKLES"
- "HAS_BOTTLE_2"
- "OPEN"
- "DRIPSTONE_THICKNESS"
- "AGE_15"
- "LEVEL_HONEY"
- "CANDLES"
- "LEVEL_COMPOSTER"
- "LIT"
- "EAST_REDSTONE"
- "OCCUPIED"
- "MODE_COMPARATOR"
- "NORTH_REDSTONE"
- "IN_WALL"
- "SNOWY"
- "DOWN"
- "WEST"
- "NORTH_WALL"
- "MIN_LEVEL_CAULDRON"
- "BED_PART"
- "NORTH"
- "LEVEL_FLOWING"
- "TILT"
- "UP"
- "SOUTH_REDSTONE"
- "MAX_AGE_15"
- "HORIZONTAL_FACING"
- "BITES"
- "SLAB_TYPE"
- "MAX_AGE_2"
- "MAX_AGE_1"
- "ROTATION_16"
- "MAX_AGE_7"
- "STABILITY_DISTANCE"
- "MAX_AGE_5"
- "MAX_AGE_3"
- "MAX_AGE_25"
- "DELAY"
- "AXIS"
- "MAX_LEVEL_15"
- "HORIZONTAL_AXIS"
- "RAIL_SHAPE"
- "MOISTURE"
- "VERTICAL_DIRECTION"
- "DOUBLE_BLOCK_HALF"
- "NOTE"
- "BERRIES"
- "RESPAWN_ANCHOR_CHARGES"
- "EAST"
- "PERSISTENT"
- "HAS_RECORD"
- "FACING_HOPPER"
- "NOTEBLOCK_INSTRUMENT"
- "POWERED"
- "SHORT"
- "VINE_END"
- "WEST_REDSTONE"
- "ENABLED"
- "INVERTED"
- "FACING"
- "DISARMED"
You can make your own also using the following example:
const $BooleanProperty = Java.loadClass('net.minecraft.world.level.block.state.properties.BooleanProperty')
const $IntegerProperty = Java.loadClass('net.minecraft.world.level.block.state.properties.IntegerProperty')

onEvent('block.registry', event => {
   event.create('my_block').property($IntegerProperty.create("uses", 0, 2)).property($BooleanProperty.create("empty"))
})
Types
- basic
- detector
- slab
- stairs
- fence
- fence_gate
- wall
- wooden_pressure_plate
- stone_pressure_plate
- wooden_button
- stone_button
- falling
- crop
Detector Block Types
The detector block type can be used to run code when the block is powered with redstone signal.
Startup script code:
onEvent('block.registry', event => {
  event.create('test_block','detector').detectorId('myDetector')
}
Server script code:
onEvent('block.detector.myDetector.unpowered', event => { // you can also use powered and changed instead of upowered
        event.block.set('tnt')
}CommandEventJS
This event needs cleanup! Using it is not recommended.
Information
This event is fired when a command is executed on server side.
Parent class
Can be cancelled
Yes
Variables and Functions
| Name | Type | Info |
| parseResults | ParseResults<CommandSource> | Command params |
| exception | Exception | Error, set if something went wrong |
TagEventJS
This event is fired when a tag collection is loaded, to modify it with script. You can add and remove tags for items, blocks, fluids and entity types.
This goes into server scripts.
Parent class
Can be cancelled
No
Variables and Functions
| Name | Type | Info |
| type | String | Tag collection type. |
| get(String tag) | TagWrapper | Returns specific tag container which you can use to add or remove objects to. tag parameter can be something like 'forge:ingots/copper'. If tag doesn't exist, it will create a new one. |
| add(String tag, String[]/Regex ids) | TagWrapper | Shortcut method for event.get(tag).add(ids). |
| remove(String tag, String[]/Regex ids) | TagWrapper | Shortcut method for event.get(tag).remove(ids). |
| removeAll(String tag) | TagWrapper | Shortcut method for event.get(tag).removeAll(). |
| removeAllTagsFrom(String[] ids) | void | Removes all tags from object |
TagWrapper class
Variables and Functions
| Name | Type | Info |
| add(String[]/Regex ids) | TagWrapper (itself) | Adds an object to this tag. If string starts with # then it will add all objects from the second tag. It can be either single string, regex (/regex/flags) or array of either. |
| remove(String[]/Regex ids) | TagWrapper (itself) | Removes an object from tag, works the same as add(). |
| removeAll() | TagWrapper (itself) | Removes all entries from tag. |
| getObjectIds() | Collection<ResourceLocation> | Returns a list of all entries in a tag. Will resolve any sub-tags. |
Examples
// Listen to item tag event
onEvent('item.tags', event => {
  // Get the #forge:cobblestone tag collection and add Diamond Ore to it
  event.add('forge:cobblestone', 'minecraft:diamond_ore')

  // Get the #forge:cobblestone tag collection and remove Mossy Cobblestone from it
  event.remove('forge:cobblestone', 'minecraft:mossy_cobblestone')

  // Get #forge:ingots/copper tag and remove all entries from it
  event.removeAll('forge:ingots/copper')

  // Required for FTB Quests to check item NBT
  event.add('itemfilters:check_nbt', 'some_item:that_has_nbt_types')

  // You can create new tags the same way you add to existing, just give it a name
  event.add('forge:completely_new_tag', 'minecraft:clay_ball')

  // Removes all tags from this entry
  event.removeAllTagsFrom('minecraft:stick')

  // Add all items from the forge:stone tag to the c:stone tag, unless the id contains diorite
  const stones = event.get('forge:stone').getObjectIds()
  const blacklist = Ingredient.of(/.*diorite.*/)
  stones.forEach(stone => {
    if (!blacklist.test(stone)) {
      event.add('c:stone', stone)
    }
  })
})
Recipes use item tags, not block or fluid tags, even if items representing those are blocks. Like minecraft:cobblestone even if it's a block, it will still be an item tag for recipes.
Loot Table Modification
onEvent('block.loot_tables', event => {
  event.addSimpleBlock('minecraft:dirt', 'minecraft:red_sand')
})
onEvent('block.loot_tables', event => {
event.addSimpleBlock('minecraft:dirt') // To drop itself (fix broken blocks)
event.addSimpleBlock(/minecraft:.*_ore/, 'minecraft:red_sand') // To drop a different item
})onEvent('block.loot_tables', event => {
event.addBlock('minecraft:dirt', table => { // Build loot table manually
table.addPool(pool => {
pool.rolls = 1 // fixed
// pool.rolls = [4, 6] // or {min: 4, max: 6} // uniform
// pool.rolls = {n: 4, p: 0.3} // binominal
pool.survivesExplosion()
pool.addItem('minecraft:dirt')
pool.addItem('minecraft:dirt', 40) // 40 = weight
pool.addItem('minecraft:dirt', 40, [4, 8]) // [4-8] = count modifier, uses same syntax as rolls
// pool.addCondition({json condition, see vanilla wiki})
// pool.addEntry({json entry, see vanilla wiki for non-items})
})
})
})Example from Factorial: (adds 1-3 leaves dropped from all Leaves blocks, 4-8 logs from all log and wood blocks and 4-8 stone from Stone, Cobblestone, Andesite, Diorite and Granite)
onEvent('block.loot_tables', event => {
	event.addBlock(/minecraft:.*_leaves/, table => {
		table.addPool(pool => {
			pool.survivesExplosion()
			pool.addItem('factorial:leaf', 1, [1, 3])
		})
	})

	event.addBlock(/minecraft:.*_(log|wood)/, table => {
		table.addPool(pool => {
			pool.survivesExplosion()
			pool.addItem('factorial:wood', 1, [4, 8])
		})
	})

	event.addBlock([
		'minecraft:stone',
		'minecraft:cobblestone',
		'minecraft:andesite',
		'minecraft:diorite',
		'minecraft:granite'
	], table => {
		table.addPool(pool => {
			pool.rolls = [4, 8] // Roll the pool instead of individual items
			pool.survivesExplosion()
			pool.addItem('factorial:stone', 1)
		})
	})
})
You can also modify existing loot tables to add items to them:
onEvent('block.loot_tables', event => {
  // all dirt blocks have a 50% chance to drop an enchanted diamond sword named "test"
  event.modifyBlock(/^minecraft:.*dirt/, table => {
    table.addPool(pool => {
      pool.addItem('minecraft:diamond_sword').randomChance(0.5).enchantWithLevels(1, true).name(Text.of('Test').blue())
    })
  })
})
Other loot table types work too:
onEvent('entity.loot_tables', event => {
  // Add a loot table for the zombie that will drop 5 of either carrot (25% chance) or apple (75% chance)
  // Because the zombie already has a loot table, this will override the current one
  event.addEntity('minecraft:zombie', table => {
    table.addPool(pool => {
      pool.rolls = 5
      pool.addItem('minecraft:carrot', 1)
      pool.addItem('minecraft:apple', 3)
    })
  })

  event.modifyEntity('minecraft:pig', table => {
    table.addPool(pool => {
      // Modify pig loot table to *also* drop dirt on top of its regular drops
      pool.addItem('minecraft:dirt')
    })
  })
})
Supported table types:
| Event ID | Override method name | Modify method name |
| generic.loot_tables | addGeneric | modify |
| block.loot_tables | addBlock | modifyBlock |
| entity.loot_tables | addEntity | modifyEntity |
| gift.loot_tables | addGift | modify |
| fishing.loot_tables | addFishing | modify |
| chest.loot_tables | addChest | modify |
RecipeEventJS
Examples
The most basic script to add a single recipe:
onEvent('recipes', event => {
  event.shaped('3x minecraft:stone', [
    'SAS',
    'S S',
    'SAS'
  ], {
    S: 'minecraft:sponge',
    A: 'minecraft:apple'
  })
})
The most basic script to remove a recipe:
onEvent('recipes', event => {
  event.remove({output: 'minecraft:stick'})
})
Example recipe script:
// kubejs/server_scripts/example.js
// This is just an example script to show off multiple types of recipes and removal methods
// Supports /reload

// Listen to server recipe event
onEvent('recipes', event => {
  // Remove broken recipes from vanilla and other mods
  // This is on by default, so you don't need this line
  //event.removeBrokenRecipes = true

  event.remove({}) // Removes all recipes (nuke option, usually not recommended)
  event.remove({output: 'minecraft:stone_pickaxe'}) // Removes all recipes where output is stone pickaxe
  event.remove({output: '#minecraft:wool'}) // Removes all recipes where output is Wool tag
  event.remove({input: '#forge:dusts/redstone'}) // Removes all recipes where input is Redstone Dust tag
  event.remove({mod: 'quartzchests'}) // Remove all recipes from Quartz Chests mod
  event.remove({type: 'minecraft:campfire_cooking'}) // Remove all campfire cooking recipes
  event.remove({id: 'minecraft:glowstone'}) // Removes recipe by ID. in this case, data/minecraft/recipes/glowstone.json
  event.remove({output: 'minecraft:cooked_chicken', type: 'minecraft:campfire_cooking'}) // You can combine filters, to create ANDk logic

  // You can use 'mod:id' syntax for 1 sized items. For 2+ you need to use '2x mod:id' or Item.of('mod:id', count) syntax. If you want NBT or chance, 2nd is required

  // Add shaped recipe for 3 Stone from 8 Sponge in chest shape
  // (Shortcut for event.recipes.minecraft.crafting_shaped)
  // If you want to use Extended Crafting, replace event.shapeless with event.recipes.extendedcrafting.shapeless_table
  event.shaped('3x minecraft:stone', [
    'SAS',
    'S S',
    'SAS'
  ], {
    S: 'minecraft:sponge',
    A: 'minecraft:apple'
  })

  // Add shapeless recipe for 4 Cobblestone from 1 Stone and 1 Glowstone
  // (Shortcut for event.recipes.minecraft.crafting_shapeless)
  // If you want to use Extended Crafting, replace event.shapeless with event.recipes.extendedcrafting.shaped_table
  event.shapeless('4x minecraft:cobblestone', ['minecraft:stone', '#forge:dusts/glowstone'])

  // Add Stonecutter recipe for Golden Apple to 4 Apples
  event.stonecutting('4x minecraft:apple', 'minecraft:golden_apple')
  // Add Stonecutter recipe for Golden Apple to 2 Carrots
  event.stonecutting('2x minecraft:carrot', 'minecraft:golden_apple')

  // Add Furnace recipe for Golden Apple to 3 Carrots
  // (Shortcut for event.recipes.minecraft.smelting)
  event.smelting('2x minecraft:carrot', 'minecraft:golden_apple')
  // Similar recipe to above but this time it has a custom, static ID - normally IDs are auto-generated and will change. Useful for Patchouli
  event.smelting('minecraft:golden_apple', 'minecraft:carrot').id('mymodpack:my_recipe_id')

  // Add similar recipes for Blast Furnace, Smoker and Campfire
  event.blasting('3x minecraft:apple', 'minecraft:golden_apple')
  event.smoking('5x minecraft:apple', 'minecraft:golden_apple')
  event.campfireCooking('8x minecraft:apple', 'minecraft:golden_apple')
  // You can also add .xp(1.0) at end of any smelting recipe to change given XP

  // Add a smithing recipe that combines 2 items into one (in this case apple and gold ingot into golden apple)
  event.smithing('minecraft:golden_apple', 'minecraft:apple', 'minecraft:gold_ingot')

  // Create a function and use that to make things shorter. You can combine multiple actions
  let multiSmelt = (output, input, includeBlasting) => {
    event.smelting(output, input)

    if (includeBlasting) {
      event.blasting(output, input)
    }
  }

  multiSmelt('minecraft:blue_dye', '#forge:gems/lapis', true)
  multiSmelt('minecraft:black_dye', 'minecraft:ink_sac', true)
  multiSmelt('minecraft:white_dye', 'minecraft:bone_meal', false)

  // If you use custom({json}) it will be using vanilla Json/datapack syntax. Must include "type": "mod:recipe_id"!
  // You can add recipe to any recipe handler that uses vanilla recipe system or isn't supported by KubeJS
  // You can copy-paste the json directly, but you can also make more javascript-y by removing quotation marks from keys
  // You can replace {item: 'x', count: 4} in result fields with Item.of('x', 4).toResultJson()
  // You can replace {item: 'x'} / {tag: 'x'} with Ingredient.of('x').toJson() or Ingredient.of('#x').toJson()
  // In this case, add Create's crushing recipe, Oak Sapling to Apple + 50% Carrot

  // Important! Create has integration already, so you don't need to use this. This is just an example for datapack recipes!
  // Note that not all mods format their jsons the same, often the key names ('ingredients', 'results', ect) are different.
  // You should check inside the mod jar (mod.jar/data/modid/recipes/) for examples
  event.custom({
    type: 'create:crushing',
    ingredients: [
      Ingredient.of('minecraft:oak_sapling').toJson()
    ],
    results: [
      Item.of('minecraft:apple').toResultJson(),
      Item.of('minecraft:carrot').withChance(0.5).toResultJson()
    ],
    processingTime: 100
  })

  // Example of using items with NBT in a recipe
  event.shaped('minecraft:book', [
    'CCC',
    'WGL',
    'CCC'
  ], {
    C: '#forge:cobblestone',
    // Item.of('id', '{key: value}'), it's recommended to use /kubejs hand
    // If you want to add a count its Item.of('id', count, '{key: value}'). This won't work here though as crafting table recipes to do accept stacked items
    L: Item.of('minecraft:enchanted_book', '{StoredEnchantments:[{lvl:1,id:"minecraft:sweeping"}]}'),
    // Same principle, but if its an enchantment, there's a helper method
    W: Item.of('minecraft:enchanted_book').enchant('minecraft:respiration', 2),
    G: '#forge:glass'
  })

  // In all shapeless crafting recipes, replace any planks with Gold Nugget in input items
  event.replaceInput({type: 'minecraft:crafting_shapeless'}, '#minecraft:planks', 'minecraft:gold_nugget')

  // In all recipes, replace Stick with Oak Sapling in output items
  event.replaceOutput({}, 'minecraft:stick', 'minecraft:oak_sapling')

  // By default KubeJS will mirror and shrink recipes, which makes things like UU-Matter crafting (from ic2) harder to do as you have less shapes.
  // You can use noMirror() and noShrink() to stop this behaviour.
  event.shaped('9x minecraft:emerald', [
    ' D ',
    'D  ',
    '   '
  ], {
    D: 'minecraft:diamond'
  }).noMirror().noShrink()
})
Possible settings you can change for recipes. It's recommended that you put this in it's own server scripts file, like settings.js
// priority: 5

// Enable recipe logging, off by default
settings.logAddedRecipes = true
settings.logRemovedRecipes = true
// Enable skipped recipe logging, off by default
settings.logSkippedRecipes = true
// Enable erroring recipe logging, on by default, recommended to be kept to true
settings.logErroringRecipes = false
As mentioned before, you can add any recipe from any mod with JSON syntax (see event.custom({})) but these mods are supported as addons with special syntax:
Ingredient Actions
Poorly documented things below!
You can transform ingredients in shaped and shapeless recipes by adding these functions at end of it:
- .damageIngredient(IngredientFilter filter, int damage?) // Will damage item when you craft with it
- .replaceIngredient(IngredientFilter filter, ItemStackJS item) // Will replace item with another (like bucket)
- .keepIngredient(IngredientFilter filter) // Will keep item without doing anything to it
- .customIngredientAction(IngredientFilter filter, String customId) // Custom action that has to be registered in startup script
IngredientFilter can be either
- ItemStackJS ('minecraft:dirt', Item.of('minecraft:diamond_sword').ignoreNBT(), etc)
- Integer index of item in crafting table (0, 1, etc)
- Object with item and/or index ( {item: 'something', index: 0}, etc)
Examples:
onEvent('recipes', event => {
  	event.shapeless('9x minecraft:melon_slice', [ // Craft 9 watermelon slices
		Item.of('minecraft:diamond_sword').ignoreNBT(), // Diamond sword that ignores damage
		'minecraft:melon' // Watermelon block
	]).damageIngredient(Item.of('minecraft:diamond_sword').ignoreNBT()) // Damage the sword (also has to ignore damage or only 0 damage will work)

    // Craft example block from 2 diamond swords and 2 dirt. After crafting first diamond sword is damaged (index 0) and 2nd sword is kept without changes.
	event.shaped('kubejs:example_block', [
		'SD ',
		'D S'
	], {
		S: Item.of('minecraft:diamond_sword').ignoreNBT(),
		D: 'minecraft:dirt'
	}).damageIngredient(0).keepIngredient('minecraft:diamond_sword')

    // Craft example block from 2 diamond swords and 2 stones. After crafting, diamond sword is replaced with stone sword
	event.shapeless('kubejs:example_block', [
		Item.of('minecraft:diamond_sword').ignoreNBT(),
		'minecraft:stone',
		Item.of('minecraft:diamond_sword').ignoreNBT(),
		'minecraft:stone'
	]).replaceIngredient('minecraft:diamond_sword', 'minecraft:stone_sword')

    // Craft clay from sand, bone meal, dirt and water bottle. After crafting, glass bottle is left in place of water bottle
	event.shapeless('minecraft:clay', [
		'minecraft:sand',
		'minecraft:bone_meal',
		'minecraft:dirt',
		Item.of('minecraft:potion', {Potion: "minecraft:water"})
	]).replaceIngredient({item: Item.of('minecraft:potion', {Potion: "minecraft:water"})}, 'minecraft:glass_bottle')

  	// Register a customIngredientAction, and recipe that uses it
  	// This one takes the nbt from an enchanted book and applies it to a tool in the crafting table, for no cost.
  	// Thanks to Prunoideae for providing it!
  	Ingredient.registerCustomIngredientAction("apply_enchantment", (itemstack, index, inventory) => {
        let enchantment = inventory.get(inventory.find(Item.of("minecraft:enchanted_book").ignoreNBT())).nbt;
        if (itemstack.nbt == null)
            itemstack.nbt = {}
        itemstack.nbt = itemstack.nbt.merge({ Enchantments: enchantment.get("StoredEnchantments") })
        return itemstack;
    })

 	event.shapeless("minecraft:book", ["#forge:tools", Item.of("minecraft:enchanted_book").ignoreNBT()])
        .customIngredientAction("#forge:tools", "apply_enchantment")
})Item Modification
item.modification event is a startup script event that allows you to change properties of existing items
onEvent('item.modification', event => {
  event.modify('minecraft:ender_pearl', item => {
    item.maxStackSize = 64
    item.fireResistant = true
  })
})
All available properties:
- int maxStackSize
- int maxDamage
- int burnTime
- String craftingReminder
- boolean fireResistant
- Rarity rarity
- tier = tierOptions => {
- int uses
- float speed
- float attackDamageBonus
- int level
- int enchantmentValue
- Ingredient repairIngredient
- }
- foodProperties = food => { // note: uses functions instead of a = b
- hunger(int)
- saturation(float)
- meat(boolean)
- alwaysEdible(boolean)
- fastToEat(boolean)
- effect(String effectId, int duration, int amplifier, float probability)
- removeEffect(String effectId)
- }
WorldgenAddEventJS (1.16)
This event isn't complete yet and can only do basic things. Adding dimension-specific features also isn't possible yet, but is planned.
Example script: (kubejs/startup_scripts/worldgen.js)
onEvent('worldgen.add', event => {
  event.addLake(lake => { // Create new lake feature
    lake.block = 'minecraft:diamond_block' // Block ID (Use [] syntax for properties)
    lake.chance = 3 // Spawns every ~3 chunks
  })

  event.addOre(ore => {
    ore.block = 'minecraft:glowstone' // Block ID (Use [] syntax for properties)
    ore.spawnsIn.blacklist = false // Inverts spawn whitelist
    ore.spawnsIn.values = [ // List of valid block IDs or tags that the ore can spawn in
      '#minecraft:base_stone_overworld' // Default behavior - ores spawn in all stone types
    ]

    ore.biomes.blacklist = true // Inverts biome whitelist
    ore.biomes.values = [ // Biomes this ore can spawn in
      'minecraft:plains', // Biome ID
      '#nether' // OR #category, see list of categories below
    ]

    ore.clusterMinSize = 5 // Min blocks per cluster (currently ignored, will be implemented later, it's always 1)
    ore.clusterMaxSize = 9 // Max blocks per cluster
    ore.clusterCount = 30 // Clusters per chunk
    ore.minHeight = 0 // Min Y ore spawns in
    ore.maxHeight = 64 // Max Y ore spawns in
    ore.squared = true // Adds random value to X and Z between 0 and 16. Recommended to be true
    // ore.chance = 4 // Spawns the ore every ~4 chunks. You usually combine this with clusterCount = 1 for rare ores
  })

  event.addSpawn(spawn => { // Create new entity spawn
    spawn.category = 'creature' // Category, can be one of 'creature', 'monster', 'ambient', 'water_creature' or 'water_ambient'
    spawn.entity = 'minecraft:pig' // Entity ID
    spawn.weight = 10 // Weight
    spawn.minCount = 4 // Min entities per group
    spawn.maxCount = 4 // Max entities per group
  })
})
All values are optional. All feature types have biomes field like addOre example
Valid biome categories ('#category'):
- taiga
- extreme_hills
- jungle
- mesa
- plains
- savanna
- icy
- the_end
- beach
- forest
- ocean
- desert
- river
- swamp
- mushroom
- nether
You can also use ('$type' (case doesn't matter)) on Forge's BiomeDictionary:
- hot
- cold
- wet
- dry
- sparse
- dense
- spooky
- dead
- lush
- etc.... see BiomeDictionary for more
This is the order vanilla worldgen happens:
- raw_generation
- lakes
- local_modifications
- underground_structures
- surface_structures
- strongholds
- underground_ores
- underground_decoration
- vegetal_decoration
- top_layer_modification
Block Modification
block.modification event is a startup script event that allows you to change properties of existing blocks
onEvent('block.modification', event => {
  event.modify('minecraft:stone', block => {
    block.destroySpeed = 0.1
    block.hasCollision = false
  })
})
All available properties:
- String material
- boolean hasCollision
- float destroySpeed
- float explosionResistance
- boolean randomlyTicking
- String soundType
- float friction
- float speedFactor
- float jumpFactor
- int lightEmission
- boolean requiredTool
JEI Integration
All JEI events are client sided and so go in the client_scripts folder
Sub-types
onEvent('jei.subtypes', event => {
  event.useNBT('example:item')
  event.useNBTKey('example:item', 'type')
})
Hide Items & Fluids
onEvent('jei.hide.items', event => {
  event.hide('example:ingredient')
})

onEvent('jei.hide.fluids', event => {
  event.hide('example:fluid')
})
Add Items & Fluids
onEvent('jei.add.items', event => {
  event.add(Item.of('example:item', {test: 123}))
})

onEvent('jei.add.fluids', event => {
  event.add('example:fluid')
})
Add Information
onEvent('jei.information', event => {
  event.add('example:ingredient', ['Line 1', 'Line 2'])
})
Hide categories
onEvent('jei.remove.categories', event => {
  console.log(event.getCategoryIds()) //log a list of all category ids to logs/kubejs/client.txt

  event.remove('create:compacting')
})WorldgenRemoveEventJS (1.16)
For more information on biomes field, see worldgen.add event page.
onEvent('worldgen.remove', event => {
  event.removeOres(ores => {
    ores.blocks = [ 'minecraft:coal_ore', 'minecraft:iron_ore' ] // Removes coal and iron ore
    ores.biomes.values = [ 'minecraft:plains' ] // Removes it only from plains biomes
  })

  event.removeSpawnsByID(spawns => {
    spawns.entities.values = [
      'minecraft:cow',
      'minecraft:chicken',
      'minecraft:pig',
      'minecraft:zombie'
    ]
  })

  event.removeSpawnsByCategory(spawns => {
    spawns.biomes.values = [
      'minecraft:plains'
    ]
    spawns.categories.values = [
      'monster'
    ]
  })
})
If something isn't removing, you may try to remove it "manually" by first printing all features (this will spam your console a lot, I suggest reading logs/kubejs/startup.txt) and then removing them by ID where possible.
onEvent('worldgen.remove', event => {
  // May be one of the decoration types/levels described in worldgen.add docs
  // But ores are *most likely* to be generated in this one
  event.printFeatures('underground_ores')
})
onEvent('worldgen.remove', event => {
event.removeFeatureById('underground_ores', 'mekanism:ore_copper')
})REI Integration
Note: REI integration only works on Fabric in 1.16. In 1.18+, it works on both Forge and Fabric!
All REI events are client sided and so go in the client_scripts folder
For 1.19+, see below (this is a temporary page!)
Hide Items
onEvent('rei.hide.items', event => {
  event.hide('example:ingredient')
})
Add Items
onEvent('rei.add.items', event => {
  event.add(Item.of('example:item', { test: 123 })
})
Add Information
onEvent('rei.information', event => {
  event.add('example:ingredient', 'Title', ['Line 1', 'Line 2'])
})
Yeet categories
onEvent('rei.remove.categories', event => {
  console.log(event.getCategoryIds()) //log a list of all category ids to logs/kubejs/client.txt

  //event.remove works too, but yeeting is so much more fun 😉
  event.yeet('create:compacting')
})
Grouping / Collapsible Entries (1.18.2+)
onEvent('rei.group', event => {
  // This event allows you to add custom entry groups to REI, which can be used to clean up the entry list significantly.
  // As a simple example, we can add a 'Swords' group which will contain all (vanilla) swords
  // Note that each group will need an id (ResourceLocation) and a display name (Component / String)
  event.groupItems('kubejs:rei_groups/swords', 'Swords', [
    'minecraft:wooden_sword',
    'minecraft:stone_sword',
    'minecraft:iron_sword',
    'minecraft:diamond_sword',
    'minecraft:golden_sword',
    'minecraft:netherite_sword'
  ])

  // An easy use case for grouping stuff together could be using tags:
  // In this case, we want all the Hanging Signs and Sign Posts from Supplementaries to be grouped together
  event.groupItemsByTag('supplementaries:rei_groups/hanging_signs', 'Hanging Signs', 'supplementaries:hanging_signs')
  event.groupItemsByTag('supplementaries:rei_groups/sign_posts', 'Sign Posts', 'supplementaries:sign_posts')

  // Another example: We want all of these items to be grouped together ignoring NBT,
  // so you don't have a bajillion potions and enchanted books cluttering up REI anymore
  const useNbt = ['potion', 'enchanted_book', 'splash_potion', 'tipped_arrow', 'lingering_potion']

  useNbt.forEach(id => {
    const item = Item.of(id)
    const { namespace, path } = Utils.id(item.id)
    event.groupSameItem(`kubejs:rei_groups/${namespace}/${path}`, item.name, item)
  })

  // Items can also be grouped using anything that can be expressed as an IngredientJS,
  // including for example regular expressions or lists of ingredients
  event.groupItems('kubejs:rei_groups/spawn_eggs', 'Spawn Eggs', [
    /spawn_egg/,
    /^ars_nouveau:.*_se$/,
    'supplementaries:red_merchant_spawn_egg'
  ])

  // you can even use custom predicates for grouping, like so:
  event.groupItemsIf('kubejs:rei_groups/looting_stuff', 'Stuff with Looting I', item =>
    // this would group together all items that have the Looting I enchantment on them
    item.hasEnchantment('minecraft:looting', 1)
  )

  // you can also group fluids in much the same way as you can group items, for instance:
  event.groupFluidsByTag('kubejs:rei_groups/fluid_tagged_as_water', '\'Water\' (yeah right lmao)', 'minecraft:water')
})
This below code is meant for 1.19+
Hide Items
REIEvents.hide('item', event => {
  event.hide('example:ingredient')
})
Add Items
REIEvents.add('item', event => {
  event.add(Item.of('example:item', { test: 123 })
})
Add Information
REIEvents.information(event => {
  event.addItem('example:ingredient', 'Title', ['Line 1', 'Line 2'])
})
Yeet categories
REIEvents.removeCategories(event => {
  console.log(event.getCategoryIds()) //log a list of all category ids to logs/kubejs/client.txt

  //event.remove works too, but yeeting is so much more fun 😉
  event.yeet('create:compacting')
})
Grouping / Collapsible Entries (1.18.2+)
REIEvents.groupEntries(event => {
  // This event allows you to add custom entry groups to REI, which can be used to clean up the entry list significantly.
  // As a simple example, we can add a 'Swords' group which will contain all (vanilla) swords
  // Note that each group will need an id (ResourceLocation) and a display name (Component / String)
  event.groupItems('kubejs:rei_groups/swords', 'Swords', [
    'minecraft:wooden_sword',
    'minecraft:stone_sword',
    'minecraft:iron_sword',
    'minecraft:diamond_sword',
    'minecraft:golden_sword',
    'minecraft:netherite_sword'
  ])

  // An easy use case for grouping stuff together could be using tags:
  // In this case, we want all the Hanging Signs and Sign Posts from Supplementaries to be grouped together
  event.groupItemsByTag('supplementaries:rei_groups/hanging_signs', 'Hanging Signs', 'supplementaries:hanging_signs')
  event.groupItemsByTag('supplementaries:rei_groups/sign_posts', 'Sign Posts', 'supplementaries:sign_posts')

  // Another example: We want all of these items to be grouped together ignoring NBT,
  // so you don't have a bajillion potions and enchanted books cluttering up REI anymore
  const useNbt = ['potion', 'enchanted_book', 'splash_potion', 'tipped_arrow', 'lingering_potion']

  useNbt.forEach(id => {
    const item = Item.of(id)
    const { namespace, path } = Utils.id(item.id)
    event.groupSameItem(`kubejs:rei_groups/${namespace}/${path}`, item.name, item)
  })

  // Items can also be grouped using anything that can be expressed as an IngredientJS,
  // including for example regular expressions or lists of ingredients
  event.groupItems('kubejs:rei_groups/spawn_eggs', 'Spawn Eggs', [
    /spawn_egg/,
    /^ars_nouveau:.*_se$/,
    'supplementaries:red_merchant_spawn_egg'
  ])

  // you can even use custom predicates for grouping, like so:
  event.groupItemsIf('kubejs:rei_groups/looting_stuff', 'Stuff with Looting I', item =>
    // this would group together all items that have the Looting I enchantment on them
    item.hasEnchantment('minecraft:looting', 1)
  )

  // you can also group fluids in much the same way as you can group items, for instance:
  event.groupFluidsByTag('kubejs:rei_groups/fluid_tagged_as_water', '\'Water\' (yeah right lmao)', 'minecraft:water')
})ItemTooltipEventJS
A client event that allows adding tooltips to any item!
onEvent('item.tooltip', tooltip => {
  // Add tooltip to all of these items
  tooltip.add(['quark:backpack', 'quark:magnet', 'quark:crate'], 'Added by Quark Oddities')
  // You can also use any ingredient except #tag (due to tags loading much later than client scripts)
  tooltip.add(/refinedstorage:red_/, 'Can be any color')
  // Multiple lines with an array []. You can also escape ' by using other type of quotation marks
  tooltip.add('thermal:latex_bucket', ["Not equivalent to Industrial Foregoing's Latex", 'Line 2 text would go here'])
  // Use some data from the client to decorate this tooltip. name returns a component so we just append that.
  tooltip.add('minecraft:skeleton_skull', Text.of('This used to be ').append(Client.player.name).append("'s head"))

  tooltip.addAdvanced('thermal:latex_bucket', (item, advanced, text) => {
    text.add(0, Text.of('Hello')) // Adds text in first line, pushing the items name down a line. If you want the line below the item name, the index must be 1
  })

  tooltip.addAdvanced('minecraft:beacon', (item, advanced, text) => {
    // shift, alt and ctrl are all keys you can check!
    if (!tooltip.shift) {
      text.add(1, [Text.of('Hold ').gold(), Text.of('Shift ').yellow(), Text.of('to see more info.').gold()])
    } else {
      text.add(1, Text.green('Gives positive effects to players in a range').bold(true))
      text.add(2, Text.red('Requires a base built out of precious metals or gems to function!'))
      text.add(3, [Text.white('Iron, '), Text.aqua('Diamonds, '), Text.gold('Gold '), Text.white('or even '), Text.green('Emeralds '), Text.white('are valid base blocks!')])
    }
  })

  // Neat utility to display NBT in the tooltip
  tooltip.addAdvanced(Ingredient.all, (item, advanced, text) => {
    if (tooltip.alt && item.nbt) {
      text.add(Text.of('NBT: ').append(Text.prettyPrintNbt(item.nbt)))
    }
  })

  // Show the name of the player who owns the skull in a skulls tooltip
  tooltip.addAdvanced('minecraft:player_head', (item, advanced, text) => {
    let playername = item.nbt?.SkullOwner?.Name
    if (playername) {
      text.add(Text.red(`The head of ${playername}`))
    }
  })
})Worldgen Events
These following examples will only work on 1.18+! If you need examples for 1.16, you can look here if you want to add new features to world generation and here if you want to remove features from it.
General Notes
Biome Filters:
Biome filters work similarly to recipe filters, and can be used to create complex and exact filters to fine tune exactly where your features may and may not spawn in the world. They are used for the biomes field of a feature and may look something like this:
onEvent('worldgen.add', event => {
  event.addOre(ore => {
    // let's look at all of the 'simple' filters first
    ore.biomes = 'minecraft:plains' 		// only spawn in exactly this biome
    ore.biomes = /^minecraft:.*/			// spawn in all biomes that match the given pattern (here: anything that starts with minecraft:)
    ore.biomes = '#minecraft:is_forest' 	// [1.19+] spawn in all biomes tagged as 'minecraft:is_forest'
    ore.biomes = '^nether' 				// [1.18 only!] spawn in all biomes in the 'nether' category (see Biome Categories)
    ore.biomes = '$hot'					// [Forge 1.18 only!] spawn in all biomes that have the 'hot' biome type (see Biome Dictionary)
    // filters can be arbitrarily combined using AND, OR and NOT logic
    ore.biomes = {}						// empty AND filter, always true
    ore.biomes = []						// empty OR filter, also always true
    ore.biomes = {
      not: 'minecraft:ocean'				// spawn in all biomes that are NOT 'minecaraft:ocean'
    }
    // since AND filters are expressed as maps and expect string keys,
    // all of the 'primitive' filters can also be expressed as such
    ore.biomes = {					// see above for an explanation of these filters
      id: 'minecraft:plains',
      id: /^minecraft:.*/,			// regex (also technically an id filter)
      tag: '#minecraft:is_forest',
      category: '^nether',
      biome_type: '$hot',
    }
    // note all of the above syntax may be mixed and matched individually
    // for example, this will spawn the feature in any biome that is
    // either plains, or a hot biome that is not in the nether or savanna categories
    ore.biomes = [
      'minecraft:plains', {
        biome_type: '$hot',
        not: [
          '#nether',
          { category: 'savanna' }
        ]
      },
    ]
  })
})
Rule Tests and Targets:
In 1.18, Minecraft worldgen has changed to a "target"-based replacement system, meaning you can specify specific blocks to be replaced with specific other blocks within the same feature configuration. (This is used to replace stone with the normal ore and deepslate with the deepslate ore variant, for example).
Each target gets a "rule test" as input (something that checks if a given block state should be replaced or not) and produces a specific output block state. On the KubeJS script side, both of these concepts are expressed as the same class: BlockStatePredicate.
Syntax-wise, BlockStatePredicate is pretty similar to biome filters as they too can be combined using AND or OR filters (which is why we will not be repeating that step here), and can be used to match one of three different things fundamentally:
- Blocks (these are simply parsed as strings, so for example
"minecraft:stone"to match Stone) - Block States (these are parsed as the block id followed by an array of properties, so you would use something like
"minecraft:furnace[lit=true]"to match only furnace blocks that are active (lit). You can use F3 to figure out a block's properties, as well as possible values through using the debug stick. - Block Tags (as you might expect, these are parsed in the "familiar" tag syntax, so you could for example use
"#minecraft:base_stone_overworld"to match all types of stone that can be found generating in the ground in the overworld. Note that these are block tags, not item tags, so they may (and probably will) be different! (F3 is your friend!)
You can also use regular expressions with block filters, so /^mekanism:.*_ore$/ would match any block from Mekanism whose id ends with "_ore". Keep in mind this will not match block state properties!
When a RuleTest is required instead of a BlockStatePredicate, you can also supply that rule test directly in the form of a JavaScript object (it will then be parsed the same as vanilla would parse JSON or NBT objects). This can be useful if you want rule tests that have a random chance to match, for example!
More examples on how targets work can be found in the example script down below.
Height Providers:
Another system that may appear a bit confusing at first is the system of "height providers", which are used to determine at what Y level a given ore should spawn and with what frequency. Used in tandem with this feature are the so-called "vertical anchors", which may be used to get the height of something relative to a specific anchor point (for example the top or bottom of the world)
In KubeJS, this system has been simplified a bit to make it easier to use for script developers: To use the two most common types of ore placement, uniform (the feature has the same chance to spawn anywhere in between the two anchors) and triangle (the feature is more likely to spawn in the center of the two anchors than it is to spawn further outwards), you can use the methods uniformHeight and traingleHeight in AddOreProperties, respectively. Vertical anchors have also been simplified, as you can use the aboveBottom / belowTop helper methods in AddOreProperties, or, in newer KubeJS versions, the builtin class wrapper for VerticalAnchor (Note that the former has been deprecated in favour of the latter), as well as if you want to specify absolute heights as simple numbers, instead.
Once again, see the example script for more information!
(1.18 only!) Biome Categories:
Biome categories are a vanilla system that can be used to roughly sort biomes into predefined categories, which are noted below. Note that other mods may add more categories through extending the enum, however since there is no way for us to know this we will only provide you with the vanilla IDs here:
- taiga
- extreme_hills
- jungle
- mesa
- plains
- savanna
- icy
- the_end
- beach
- forest
- ocean
- desert
- river
- swamp
- mushroom
- nether
(1.18 and Forge only!) Biome Dictionary:
Much like Vanilla biome categories, Forge uses a "Biome Dictionary" to sort biomes based on their properties. Note that this system is designed to be extended by mods, so there is no way for us to give a complete list of all categories to you, however some of the ones you might commonly find yourself using are listed here:
- hot
- cold
- wet
- dry
- sparse
- dense
- spooky
- dead
- lush
- etc.... see BiomeDictionary for more
In 1.19, both of these systems have been removed with no replacement in favour of biome tags!
Example script: (kubejs/startup_scripts/worldgen.js)
onEvent('worldgen.add', event => {
  // use the anchors helper from the event (NOTE: this requires newer versions of KubeJS)
  // if you are using an older version of KubeJS, you can use the methods in the ore properties class
  const { anchors } = event

  event.addOre(ore => {
    ore.id = 'kubejs:glowstone_test_lmao' // (optional, but recommended) custom id for the feature
    ore.biomes = {
      not: '^savanna' // biome filter, see above (technically also optional)
    }

    // examples on how to use targets
    ore.addTarget('#minecraft:stone_ore_replaceables', 'minecraft:glowstone') // replace anything in the vanilla stone_ore_replaceables tag with Glowstone
    ore.addTarget('minecraft:deepslate', 'minecraft:nether_wart_block')       // replace Deepslate with Nether Wart Blocks
    ore.addTarget([
      'minecraft:gravel',     // replace gravel...
      /minecraft:(.*)_dirt/   // or any kind of dirt (including coarse, rooted, etc.)...
    ], 'minecraft:tnt')       // with TNT (trust me, it'll be funny)

    ore.count([15, 50])             // generate between 15 and 50 veins (chosen at random), you could use a single number here for a fixed amount of blocks
      .squared()                    // randomly spreads the ores out across the chunk, instead of generating them in a column
      .triangleHeight(				      // generate the ore with a triangular distribution, this means it will be more likely to be placed closer to the center of the anchors
        anchors.aboveBottom(32),    // the lower bound should be 32 blocks above the bottom of the world, so in this case, Y = -32 since minY = -64
        anchors.absolute(96)	      // the upper bound, meanwhile is set to be just exactly at Y = 96
      )								              // in total, the ore can be found between Y levels -32 and 96, and will be most likely at Y = (96 + -32) / 2 = 32

    // more, optional parameters (default values are shown here)
    ore.size = 9                            // max. vein size
    ore.noSurface = 0.5                     // chance to discard if the ore would be exposed to air
    ore.worldgenLayer = 'underground_ores'  // what generation step the ores should be generated in (see below)
    ore.chance = 0							// if != 0 and count is unset, the ore has a 1/n chance to generate per chunk
  })

  // oh yeah, and did I mention lakes exist, too?
  // (for now at least, Vanilla is likely to remove them in the future)
  event.addLake(lake => {
    lake.id = 'kubejs:funny_lake' // BlockStatePredicate
    lake.chance = 4
    lake.fluid = 'minecraft:lava'
    lake.barrier = 'minecraft:diamond_block'
  })
})

onEvent('worldgen.remove', event => {
  console.info('HELP')
  //console.debugEnabled = true;

  // print all features for a given biome filter
  event.printFeatures('', 'minecraft:plains')

  event.removeOres(props => {
    // much like ADDING ores, this supports filtering by worldgen layer...
    props.worldgenLayer = 'underground_ores'
    // ...and by biome
    props.biomes = [
      { category: 'icy' },
      { category: 'savanna' },
      { category: 'mesa' }
    ]

    // BlockStatePredicate to remove iron and copper ores from the given biomes
    // Note tags may NOT be used here, unfortunately...
    props.blocks = ['minecraft:iron_ore', 'minecraft:copper_ore']
  })

  // remove features by their id (first argument is a generation step)
  event.removeFeatureById('underground_ores', ['minecraft:ore_coal_upper', 'minecraft:ore_coal_lower'])
})
Generation Steps
- raw_generation
- lakes
- local_modifications
- underground_structures
- surface_structures
- strongholds
- underground_ores
- underground_decoration
- vegetal_decoration
- top_layer_modification
Chat Event
This script is peak of human evolution. Whenever someone says "Creeper" in chat, it replies with "Aw man".
onEvent('player.chat', (event) => {
  // Check if message equals creeper, ignoring case
  if (event.message.trim().equalsIgnoreCase('creeper')) {
    // Schedule task in 1 tick, because if you reply immidiently, it will print before player's message
    event.server.scheduleInTicks(1, event.server, (callback) => {
      // Tell everyone Aw man, colored green. Callback data is the server
      callback.data.tell(Text.green('Aw man'))
    })
  }
})
Another example, cancelling the chat event. No need to schedule anything now, because player's message wont be printed,
onEvent('player.chat', (event) => {
  // Check if message equals creeper, ignoring case
  if (event.message.startsWith('!some_command')) {
    event.player.tell('Hi!')
    event.cancel()
  }
})Custom Fluids
Supported by Forge on all versions, and Fabric on 1.18.2+
// Startup script
onEvent('fluid.registry', event => {
  // These first examples are 1.16.5 and 1.18.2 syntax

  // Basic "thick" (looks like lava) fluid with red tint
  event.create('thick_fluid')
    .thickTexture(0xFF0000)
    .bucketColor(0xFF0000)
    .displayName('Thick Fluid')

  // Basic "thin" (looks like water) fluid with cyan tint, has no bucket and is not placeable
  event.create('thick_fluid')
    .thinTexture(0xFF0000)
    .bucketColor(0x00FFFF)
    .displayName('Thin Fluid')
  	.noBucket() // both these methods are 1.18.2+ only
  	.noBlock()

  // Fluid with custom textures
  event.create('strawberry_cream')
  	.displayName('Strawberry Cream')
    .stillTexture('kubejs:block/strawberry_still')
    .flowingTexture('kubejs:block/strawberry_flow')
    .bucketColor(0xFF33FF)

  // For 1.18.1 the syntax is slightly different
  event.create('thick_fluid', fluid => {
       fluid.textureThick(0xFF0000) // the texture method names are different in 1.18.1 and below, textureXyz instead of xyzTexture
       fluid.bucketColor(0xFF0000)
       fluid.displayName('Thick Fluid')
  })
})
In 1.18.1, 1.17 and 1.16 the texture method names are swapped, so textureStill and textureThin instead of stillTexture and thinTexture
Methods that you can use after the event.create('name')
- displayName(name)
- color(color)
- bucketColor(color)
- builtinTextures()
- same as thinTexture(0xFFFFFF)
- stillTexture(path)
- path is the path to txture is for example maybe "minecraft:block/sand"
- this texture is recomended to be 16x16, or if animated with a mcmeta file then 16x48 for 3 frames or 16x80 for 5 or 16x240 for 15
- Frame counts of 3, 5, 15, 6, 10, or 30 will make your life easier, because the flowing animation need to be a multiple of 15 to look good
- flowingTexture(path)
- path is the path to texture is for example maybe "minecraft:block/sand"
- this texture is recommended to be 32x480 and animated with a mcmeta file
- each frame is recommended to be 32x32 (recommended to be the same 16x16 texture tiled)
- then each of these frames are shifted one pixel vertically from the previous, so it looks like its moving
- If you are going to be making your own flowing fluid texture it is highly recommended to not make these by hand (It is hours of suffering), and instead write a some program, or setup something with blender nodes to make it.
- noBucket()
- noBlock()
- gaseous()
- It is now a gas
- rarity(value)
- Can be:
- "common"
- "uncommon"
- "rare"
- "epic"
- Can be:
The following can also be used but have no effect unless a mod adds a purpose:
- luminosity(value)
- default 0
- density(value)
- default 1000
- temperature(value)
- default 300
- viscosity(value)
- default 1000
There is a good chance the following does not work at all
You can use .bucketItem to get the bucket item builder.
If you one want to use it then you can place it at the end of the other methods then use the its methods instead.
// notice this script has not been tested
onEvent('fluid.registry', event => {
  event.create('taco_suace')
                .thickTexture(0xFF0000)
                .bucketColor(0xFF0000)
                .bucketItem
                .group("food")
})
Some amount of the methods in these builders will not work or cause problems
- .bucketItem
- Any method that you can use on an item builder might work
- .bucketItem
Command Registry
This page is unfinished and only provides basic information
Example:
The following code has not been completely tested on 1.18 and not at all on 1.16
onEvent("command.registry", event => {//command registry event
    const { commands: Commands, arguments: Arguments} = event;
    event.register(//register a new command
        Commands.literal("myCommand")//the command is called myCommand
		.requires(src => src.hasPermission(2))//2 is op. This line is optional, but you can also instead of just one value, wrap it in {}s and use return to write a more complex requirement checks
		.then(Commands.argument('arg1', Arguments.STRING.create(event))//takes argument string called arg1. You can have as many (or none) as you want.
			.then(Commands.argument('arg2', Arguments.FLOAT.create(event))//takes argument float called arg2. The other type you can use can be found with ProbeJS
				.executes(ctx => {//run the command
					const arg1 = Arguments.STRING.getResult(ctx, "arg1");//get recipe
					const arg2 = Arguments.FLOAT.getResult(ctx, "arg2");//get the value
                    //your code goes here
					if(arg1 == "example")
                    	return 0//return 0 means command did not work
                    let level = ctx.source.level.asKJS()
                    let position = ctx.source.position
                    //hurt entities in a around a area of where the command was run
                    let i = 0
                    level.getEntitiesWithin(AABB.of(position.x()-2,position.y()-2,position.z()-2,position.x()+2,position.y()+2,position.z()+2)).forEach(entity => {
                    	if (entity.living) {
                          entity.attack(arg2)
                          i++
                          if (entity.type == "minecraft:player") entity.tell(arg1) //tell players that got hurt the message that is arg1
                        }
                    })
					return i // always return something
				})
			)// every then requires a ')' so dont forget them
		)//but requires does not
    )
})Datapack Load Events
You can load json datapack files programmatically!
onEvent('server.datapack.first', event => {
		event.addJson(name, json)
})
resourceLocation could be minecraft:loot_tables/entities/villager.json
json could be for example:
{
  type: "entity",
  pools: [
    {
      rolls: 2,
      bonus_rolls: 1,
      entries: [
        {
          type: "item",
          weight: 3,
          name: "minecraft:emerald"
        },
        {
          type: "empty",
          weight: 2
        }
      ]
    }
  ]
}
Note: Practically everything in vanilla has a way better to programmatically load it, so it is recommended to use this mostly for loading thing for other mods
There are different timing that you can make the file get loaded too!
server.datapack.firstserver.datapack.last
This event is useful, because instead of needing to write multiple json files, you can write one then change the values passed to it.
Example
Adds multiple advancements for using different items that reward experience:
onEvent('server.datapack.first', event => {
  	const items = ['bow', 'golden_hoe', 'flint_and_steel', 'spyglass']
    items.forEach(item => {
		event.addJson(`kubejs:advancements/${item}`, {
			criteria: {
				requirement: {
					trigger: "minecraft:using_item",
					conditions: {
						item: {
							items: [`minecraft:${item}`]
						}
					}
				}
			},
			rewards: {
				experience: 20
			}
		})
	})
})
In the custom machinery mod, the packdev needs to make a massive json file for each machine they wish to create. This script will make 16 machines, and is shorter then even a single on of the original json files would have been.
onEvent('server.datapack.first', event => {
	let json
	//create 16 custom machines with 6 inputs and 1 output
	for (let machineNumber = 0; machineNumber < 16; machineNumber++) {

		json = {
			name: {
				text: `${machineNumber}`
			},
			appearance: {},
			components: [
				{
                  "type": "custommachinery:item",
					"id": "out",
					"mode": "output"
				}
			],
			gui: [
				{
					"type": "custommachinery:progress",
					"x": 70,
					"y": 41,
					"width": 18,
					"height": 18
				},{
					"type": "custommachinery:slot",
					"x": 88,
					"y": 41,
					"id": "out"
				},{
					"type": "custommachinery:text",
					"text": `Machine ${machineNumber}`,//string builder to make the name match the machine number
					"x":16,
					"y":16
				},{
					"type": "custommachinery:texture",
					"x": 0,
					"y": 0,
					"texture": "custommachinery:textures/gui/base_background.png",
					"priority": 1000
				},{
					"type": "custommachinery:player_inventory",
					"x": 16,
					"y": 68
				}
			]
		}

		//add the input slots and corrasponding componets
		let slotNumber = 0
      	const xValues = [16,34,52]
        const yValues = [32,50]
		xValues.forEach(x => {
			yValues.forEach(y => {

				json.components.push({
					"type": "custommachinery:item",
					"id": `input${slotNumber}`,
					"mode": "input"
				})

				json.gui.push({
					"type": "custommachinery:slot",
					"x": x,
					"y": y,
					"id": `input${slotNumber}`
				})

				slotNumber++
			})
		})

		//add the json
		event.addJson(`kubejs:machines/${machineNumber}`,json)
	}
})
Examples
Example scripts for various things you can do with KubeJS
FTB Quests Integration
onEvent('ftbquests.custom_task.75381f79', event => {
  log.info('Custom task!')
  event.checkTimer = 20
  event.check = (task, player) => {
    if (player.world.daytime && player.world.raining) {
      task.progress++
    }
  }
})

onEvent('ftbquests.custom_reward.e4f76908', event => {
  log.info('Custom reward!')
  event.player.tell('Hello!')
})

// specific object completion
onEvent('ftbquests.completed.d4f36905', event => {
  if (event.player) {
    event.notifiedPlayers.tell(Text.of(`${event.player.name} completed... something!`).green())
  }
})

// generic 'quest' object completion. Note: There isnt actually a way to get reliable title on server side, so dont use event.object.title
onEvent('ftbquests.completed', event => {
  if (event.player && event.object.objectType.id === 'quest') {
    event.notifiedPlayers.tell(Text.of(`${event.player.name} completed a quest!`).blue())
  }
})

// object with tag 'ding' completion
onEvent('ftbquests.completed.ding', event => {
  event.onlineMembers.playSound('entity.experience_orb.pickup')
})

onEvent('entity.death', event => {
  if(event.server
  && event.source.actual
  && event.source.actual.player
  && event.source.actual.mainHandItem.id === 'minecraft:wooden_sword'
  && event.entity.type === 'minecraft:zombie') {
    event.source.actual.data.ftbquests.addProgress('12345678', 1)
  }
})Reflection / Java access
Very limited reflection is possible, but is not recommended. Use it in cases when KubeJS doesnt support something.
In 1.18.2+ internal Minecraft classes are remapped to MojMaps at runtime, so you don't have to use obfuscated names if accessing internal Minecraft fields and methods.
An example of adding a block with a custom material, built using reflection to get the MaterialJS class, then make a new instance of that with amethyst sounds and material properties from internal Minecraft classes.
// Startup script, 1.18.2
const MaterialJS = java("dev.latvian.mods.kubejs.block.MaterialJS")
const Material = java('net.minecraft.world.level.material.Material')
const SoundType = java('net.minecraft.world.level.block.SoundType')

amethystMaterial = new MaterialJS('amethyst', Material.AMETHYST, SoundType.AMETHYST) // f_164531_ and f_154654_ are the respective obfuscated names of these fields, for older versions

//This builder uses 1.18.2 syntax, it will not work in 1.16 or 1.18.1
onEvent('block.registry', event => {
	event.create('amethyst_slab', 'slab')
		.material(amethystMaterial)// Use the new MaterialJS instance we created as the material
		.tagBlock('minecraft:crystal_sound_blocks')
		.tagBlock('minecraft:mineable/pickaxe')
		.requiresTool(true)
		.texture('texture', 'minecraft:block/amethyst_block')
})
This does come at a cost, it takes 1-2 seconds to load this script, instead of the normal milliseconds. You should import your classes at the top of the script, instead of in an event, especially if the event gets triggered more than once.
Painter API
About
Painter API allows you to draw things on the screen, both from server and directly from client. This can allow you to create widgets from server side or effects on screen or in world from client side.
Currently it doesn't support any input, but in future, in-game menus or even GUIs similar to Source engine ones will be supported.
Paintable objects are created from NBT/Json objects and all have an id. If id isn't provided, a random one will be generated. Objects x and z are absolute positions based on screen, but you can align elements in one of the corners of screen. You can bulk add multiple objects in one json object. All properties are optional, but obviously some you should almost always override like size and position for rectangles.
paint({...}) is based on upsert principle - if object doesn't exist it will create it (if the object also contains valid type), otherwise, update existing:
event.player.paint({example: {type: 'rectangle', x: 10, y: 10, w: 20, h: 20}})- New rectangle is createdevent.player.paint({example: {x: 50}})- Updates previous rectangle with partial data
You can bulk update/create multiple things in same object:
event.player.paint({a: {x: 10}, b: {x: 30}, c: {type: 'rectangle', x: 10}})
You can remove object with remove: true, bulk remove multiple objects or remove all objects:
event.player.paint({a: {remove: true}})event.player.paint({a: {remove: true}, b: {remove: true}})event.player.paint({'*': {remove: true}})
These methods have command alternatives:
/kubejs painter @p {example: {type: 'rectangle', x: 10, y: 10, w: 20, h: 20}}
If the object is re-occuring, it's recommended to create objects at login with all of its static properties and visible: false, then update it later to unhide it. Painter objects will be cleared when players leave world/server, if its persistent, then it must be re-added at login every time.
Currently available objects
Underlined objects are not something you can create
Root
(available for all objects)
- Boolean visible
- Float x
- Float y
- Float z
- Float w
- Float h
- Enum alignX (one of 'left', 'center', 'right')
- Enum alignY (one of 'top', 'center', 'bottom')
- Enum draw (one of 'ingame', 'gui', 'always')
- Float moveX
- Float moveY
- Float expandW
- Float expandH
rectangle
- Color color
- String texture
- Float u0
- Float v0
- Float u1
- Float v1
gradient
- Color color
- Color colorT
- Color colorB
- Color colorL
- Color colorR
- Color colorTL
- Color colorTR
- Color colorBL
- Color colorBR
- String texture
- Float u0
- Float v0
- Float u1
- Float v1
text
- Text text | Text[] textLines
- Boolean shadow
- Float scale
- Color color
- Boolean centered
- Float lineSpacing
item
- ItemStack item (supports either 'itemid' or vanilla {id: 'item', Count: 4, tag: {...}} NBT syntax)
- Boolean overlay
- String customText
- Float rotation
Properties
- Unit is a Rhino Unit. It can be a number, boolean, color, equation. Every Float, Int, Boolean and Color are also Units, so you can use equations on them.
- Int is a int32 number, any whole value, e.g.
40. - Float is float64 floating point number, e.g
2.35. - String is a string, e.g.
'example'. Textures usually need resource location'namespace:path/to/texture.png'. - Color can be either
0xRRGGBB,'#RRGGBB','#AARRGGBB',e.g.'#58AD5B'or chat colors'red','dark_aqua', etc. RGBAcolor(Float, Float, Float, Float)is also supported where Float is any number between 0.0 and 1.0 (supports Units). - Text can be a string
'Example'orText.of('Red and italic string example').red().italic()etc formatted string.
Available Unit variables
- $screenW - Screen width
- $screenH - Screen height
- $delta - Render delta
- $mouseX - Mouse X position
- $mouseY - Mouse Y position
Available Unit constants
- true - boolean true value, equal to 1.0
- false - boolean false value, equal to 0.0
- PI - number equal to 3.14159265358979323846
- HALF_PI - number equal to 1.57079632679
- TWO_PI - number equal to 6.28318530718
- E - number equal to 2.7182818284590452354
Examples
onEvent('player.logged_in', event => {
	event.player.paint({
		example_rectangle: {
			type: 'rectangle',
			x: 10,
			y: 10,
			w: 50,
			h: 20,
			color: '#00FF00',
			draw: 'always'
		},
		last_message: {
			type: 'text',
			text: 'No last message',
			scale: 1.5,
			x: -4,
			y: -4,
			alignX: 'right',
			alignY: 'bottom',
			draw: 'always'
		}
	})
})

onEvent('player.chat', event => {
	// Updates example_rectangle x value and last_message text value to last message + contents from event
	event.player.paint({example_rectangle: {x: '(sin((time() * 1.1)) * (($screenW - 32) / 2))', w: 32, h: 32, alignX: 'center', texture: 'kubejs:textures/item/diamond_ore.png'}})
	event.player.paint({last_message: {text: `Last message: ${event.message}`}})
	// Bulk update, this is the same code as 2 lines above, you can use whichever you like better
	// event.player.paint({example_rectangle: {x: 120}, last_message: {text: `Last message: ${event.message}`}})
	event.player.paint({lava: {type: 'atlas_texture', texture: 'minecraft:block/lava_flow'}})
})
Units
This page describes all functions and operations available for units
Usage
Most basic unit is plain number, such as '1' or '4.5'.
You can use variables with $ like '$example'.
Each function requires name parenthesis and comma separated arguments e.g. 'min(PI, $example)'.
You can combine as many as you want, e.g. 'min(PI, 10 + $example)'.
You can do pretty complex infix, e.g. 'atan2($mouseY, $mouseX) - HALF_PI - HALF_PI / 2'.
Constants
- true - boolean true value, equal to 1.0
- false - boolean false value, equal to 0.0
- PI - number equal to 3.14159265358979323846
- HALF_PI - number equal to 1.57079632679
- TWO_PI - number equal to 6.28318530718
- E - number equal to 2.7182818284590452354
Operations
- cond ? a : b = TERNARY, if cond then a, else b
- -a = NEGATE
- a + b = SUM
- a - b = SUB
- a * b = MUL
- a / b = DIV
- a % b = MOD
- a ** b = POW
- a & b = BIT AND
- a | b = BIT OR
- a ^ b = BIT/BOOL XOR
- ~a = BIT NOT
- !a = BOOL NOT
- a << b = SHIFT LEFT
- a >> b = SHIFT RIGHT
- a == b = EQUALS
- a != b = NOT EQUALS
- a > b = GREATER THAN
- a < b = LESS THAN
- a >= b = GREATER OR EQUAL THAN
- a <= b = LESS OR EQUAL THAN
Functions
- random()
- time()
- roundTime()
- min(a, b)
- max(a, b)
- pow(a, b)
- abs(a)
- sin(a)
- cos(a)
- tan(a)
- atan(a)
- atan2(y, x)
- deg(a)
- rad(a)
- log(a)
- log10(a)
- log1p(a)
- sqrt(a)
- sq(a)
- floor(a)
- ceil(a)
- if(statement, trueUnit, falseUnit)
Network Packets
This script shows how to use network packets:
// Listen to a player event, in this case item right-click
// This goes in either server or client script, depending on which side you want to send the data packet to
onEvent('item.right_click', event => {
  // Check if item was right-clicked on client or server side
  if (event.server) {
    // Send data {test: 123} to channel "test_channel_1". Channel ID can be any string, but it's recommended to keep it to snake_case [a-z_0-9].
    // Receiving side will be client (because its sent from server).
    event.player.sendData('test_channel_1', { test: 123 })
  } else {
    // It's not required to use a different channel ID, but it's recommended.
    // Receiving side will be server (because its sent from client).
    event.player.sendData('test_channel_2', { test: 456 })
  }
})

// Listen to event that gets fired when network packet is received from server.
// This goes in a client script
onEvent('player.data_from_server.test_channel_1', event => {
  log.info(event.data.test) // Prints 123
})

// Listen to event that gets fired when network packet is received from client.
// This goes in a server script
onEvent('player.data_from_client.test_channel_2', event => {
  log.info(event.data.test) // Prints 456
})Starting Items
This server script adds items on first time player joins, checking stages. GameStages mod is not required
// Listen to player login event
onEvent('player.logged_in', event => {
  // Check if player doesn't have "starting_items" stage yet
  if (!event.player.stages.has('starting_items')) {
    // Add the stage
    event.player.stages.add('starting_items')
    // Give some items to player
    event.player.give('minecraft:stone_sword')
    event.player.give(Item.of('minecraft:stone_pickaxe', "{Damage: 10}"))
    event.player.give('30x minecraft:apple')
  }
})FTB Utilities Rank Promotions
With this script you can have FTB Utilities roles that change over time.
Is for 1.12 only. Requires FTB Utilities.
events.listen('player.tick', function (event) {
  // This check happens every 20 ticks, a.k.a every second
  if (event.player.server && event.player.ticksExisted % 20 === 0) {
    var rank = event.player.data.ftbutilities.rank
    events.post('test_event', {testValue: rank.id})
    var newRank = ftbutilities.getRank(rank.getPermission('promotion.next'))

    if (newRank) {
      var timePlayed = event.player.stats.get('stat.playOneMinute') / 20 // Seconds player has been on server
      var timeRequired = newRank.getPermissionValue('promotion.timer').getInt()

      if (timeRequired > 0 && timePlayed >= timeRequired && rank.addParent(newRank)) {
        if (!events.postCancellable('ftbutilities.rank.promoted.' + newRank.id, {'player': event.player, 'rank': newRank})) {
          event.player.tell('You have been promoted to ' + newRank.getPermission('promotion.name') + '!')
        }
        ftbutilities.saveRanks()
      }
    }
  }
})

// When player gets promoted to 'trusted' rank, give them gold ingot (uncomment the line)
events.listen('ftbutilities.rank.promoted.trusted', function (event) {
  // event.data.player.give('minecraft:gold_ingot')
})
3 example roles in ranks.txt:
[player]
power: 1
default_player_rank: true
promotion.name: Player
promotion.next: newcomer
promotion.timer: 5
command.ftbutilities.rtp: false
command.ftbutilities.home: false

[newcomer]
power: 5
promotion.name: Newcomer
promotion.next: regular
promotion.timer: 15
ftbutilities.chat.name_format: <&aNewcomer &r{name}>
command.ftbutilities.rtp: true

[regular]
power: 10
promotion.name: Regular
promotion.next: trusted
promotion.timer: 30
ftbutilities.chat.name_format: <&9Regular &r{name}>
command.ftbutilities.home: true
After 5 seconds of play time, player will be promoted to newcomer.
After 15 seconds (or 10 since previous role) they will be promoted to regular.
After 30 seconds (or 15 since previous role) they will be promoted to trusted, etc.
Clearlag 1.12
This script removes all items from world every 30 minutes. Only works in 1.12.
// Create item whitelist filter that won't be deleted with clearlag
var whitelist = Ingredient.matchAny([
  'minecraft:diamond', // Adds diamond to whitelist
  'minecraft:gold_ingot',
  '@tinkersconstruct', // Adds all items from tinkerscontruct to whitelist
  'minecraft:emerald'
])

// Create variable for last clearlag result
var lastClearLagResult = Utils.newList()
// Create variable for total number of items
var lastTotalClearLagResult = Utils.newCountingMap()

// Create new function that clears lag
var clearLag = server => {
  // Get a list of all entities on server with filter that only returns items
  var itemList = server.getEntities('@e[type=item]')
  // Create new local map for item counters
  var lastResult = Utils.newCountingMap()
  // Clear old result lists
  lastClearLagResult.clear()
  lastTotalClearLagResult.clear()
  // Iterate over each entity in itemList and add item counters
  itemList.forEach(entity => {
    if (!whitelist.test(entity.item)) {
      // Get the name of item
      var key = entity.item.name
      // Add to entity count
      lastResult.add(key, 1)
      // Add to total item count
      lastTotalClearLagResult.add(key, entity.item.count)
      // Kill the item entity
      entity.kill()
    }
  })

  // Update and sort last result list
  lastClearLagResult.addAll(lastResult.entries)
  lastClearLagResult.sort(null)

  // Tell everyone how many items will be removed
  server.tell([
    Text.lightPurple('[ClearLag]'),
    ' Removed ',
    lastTotalClearLagResult.totalCount,
    ' items. ',
    Text.yellow('Click here').click('command:/clearlagresults'),
    ' for results.'
  ])
}

// Listen for server load event
events.listen('server.load', event => {
  // Log message in console
  event.server.tell([ Text.lightPurple('[ClearLag]'), ' Timer started, clearing lag in 30 minutes!' ])
  // Schedule new task in 30 minutes
  event.server.schedule(MINUTE * 30, event.server, callback => {
    // Tell everyone on server that items will be removed
    callback.data.tell([ Text.lightPurple('[ClearLag]'), ' Removing all items on ground in one minute!' ])
    // Schedule a subtask that will clear items in one minute
    callback.data.schedule(MINUTE, callback.data, callback2 => {
      clearLag(callback2.data)
    })
    // Re-schedule this task for another 30 minutes (endless loop)
    callback.reschedule()
  })
})

// Doesnt work in 1.16+!
// Register commands
events.listen('command.registry', event => {
  // Register new OP command /clearlag, that instantly runs clearlag
  event
    .create('clearlag')
    .op()
    .execute(function (sender, args) {
      clearLag(sender.server)
    })
    .add()

  // Register new non-OP command /clearlagresults, that displays stats of all removed items from previous /clearlag
  event
    .create('clearlagresults')
    .execute((sender, args) => {
      sender.tell([ Text.lightPurple('[ClearLag]'), ' Last clearlag results:' ])

      lastClearLagResult.forEach(entry => {
        var total = lastTotalClearLagResult.get(entry.key)

        if (entry.value == total) {
          sender.tell([ Text.gold(entry.key), ': ', Text.red(entry.value) ])
        } else {
          sender.tell([ Text.gold(entry.key), ': ', Text.red(entry.value), ' entities, ', Text.red(total), ' total' ])
        }
      })
    })
    .add()
})Scheduled Server Events
At server load, you can schedule anything to happen at later time. Within callback handler you can also call callback.reschedule() to repeat this event after initial timer or callback.reschedule(newTime) to change it.
Whatever you pass as 2nd argument will be returned in callback as data.
The example script restarts server after 2 hours but notifies players 5 minutes before that.
onEvent('server.load', function (event) {
  event.server.schedule(115 * MINUTE, event.server, function (callback) {
    callback.data.tell('Server restarting in 5 minutes!')
  })

  event.server.schedule(120 * MINUTE, event.server, function (callback) {
    callback.data.runCommand('/stop')
  })
})Running Commands
Preface
Sometimes, you might want to run a command (such as /tell @a Hi!), in your code.
Most always, there is better method, but sometimes, you just don't want to learn more complicated topics, and just run a command.
Basic Usage
The most basic usage would be to call runCommand() from a server class.
Utils.server.runCommand(`tell @a Hi!`)If this command returns a message (usually an error) that is normally placed chat, it will be logged. This is not desired outside of debugging situations.
So instead you can use the following to not log these messages.
Utils.server.runCommandSilent(`tell @a Hi!`)If the server is not loaded at the time this is ran, then the code will not work.
Although you can use player.runCommandSilent(), it is not recommend as the command runs with the players permission level.
Using the execute command
Commands are ran in the default dimension (the overworld usually) at 0, 0, 0
To get around this, you can use the execute command:
//This example makes a bedrock box around creepers when they spawn
onEvent('entity.spawned', event => {
	if (event.entity.type != "minecraft:creeper") return // the following code only runs when creepers are spawned
	event.server.runCommandSilent(`execute in ${event.entity.level.dimension} positioned ${event.entity.x} ${event.entity.y} ${event.entity.z} run fill ~-1 ~-1 ~-1 ~1 ~2 ~1 bedrock hollow`)
})
Spawning Entities
Basics
Overview
Spawning entities consists of 3 steps:
- Making the variable storing the future entity
- Modifying the attributes of the entity
- Spawning the entity
Making a variable to store the entity
Example
level is just a placeholder, in your code it needs to be defined, for many events you can use event.level in place of level and it will work
You can create a entity from a block instead of level, and this is often preferred to learn that, scroll to that section afterward
let myEntity = level.createEntity("cow")Breaking down the example
- let
- Indicate that we are making a new variable and get the game ready to store it.
- Not required in 1.16.
- myEntity
- This is the name of the variable.
- Can be anything you chose that is a-Z,0-9 without spaces (you know like any other variable).
- =
- sets myEntity to what is about to follow.
- level
- This is any level object that you choose.
- This can be obtained numerous ways and will depend on what you are trying to do.
- In many events you can use
event.levelto get the level. - Note: this is a LevelJS object, not a minecraftLevel object.
minecraftLevel.asKJS()returns a LevelJS.
- .
- The dot operator either
- Gets a property of the object.
- Calls a method of the object.
- Calls a beaned method of the object.
- In this case it is used to call the method
createEntity. You can tell because the following parenthesis mean its a method.
- The dot operator either
- createEntity(...)
- As mentioned above is the method called by the dot operator
- "cow"
- this is the name of the entity
- "minecraft:cow" or "create:potato_projectile" are also valid
- in fact when you put a resource location without a prefix, then
minecraft:will be assumed.
- in fact when you put a resource location without a prefix, then
Modifying the properties
Example
myEntity.x = 0
myEntity.y = 69
myEntity.z = 0
myEntity.motionY = 0.1
myEntity.noGravity = true
Breaking Down the Example
- myEntity
- Gets the variable that was made earlier.
- .
- The dot operator mentioned earlier.
- motionY = 0.1
- Instead of being a method, like last time, this is a beaned method.
- This means that there exists a method
setMotionand under the hood it runssetMotionY(0.1)that is automatically called with this code. - In this case it sets the
motionYproperty of the entity. -
You many not change arbitrary bits of NBT this way! Only bits that there is a method for. In the example, all of the lines are just running beaned methods. However, you can do it with a different method, listed in a different section below.
Spawning the entity
Example
myEnity.spawn()With understanding from the previous sections you should be able to figure out what this does.
It get myEntity, then calls the method .spawn().
This spawn() method creates the entity in the world.
Note: myEntity is still a variable! So you may not use let myEntity again within the scope! However this variable is still linked to the entity so calling myEntity.motionY = 0.1 will still set the vertical motion of the entity. (This can be a useful thing, but bad if you are unaware)
Creating the entity from a block
You can also call createEntity from a block! This is handy if you want to spawn the entity in the position of a block.
let myEntity = block.createEntity("cow")Again, block is just a place holder, you will need to change it to something else like maybe event.block for your code to work!
This does not spawn the entity in the center of the block, it just sets the entity's coordinates to that of the block, thus being misaligned
This code offsets the entity to be in the center of the block.
let myEntity = block.createEntity("cow")
myEntity.x+=0.5
myEntity.y+=0.5
myEntity.z+=0.5
Setting NBT
You can set the NBT to whatever you want! It's recommend using mergeFullNBT to do this.
myEntity.withNBT({VillagerData:{}})myEntity.fullNBT.VillagerData = {} will not work, because .fullNBT is a beaned method, not a property! The only thing that the beaned method lets do is to be able to use let nbt = myEntity.fullNBT to set a variable to NBT to be read or use myEntity.fullNBT = {} to set all of it at once.
Note it is fullNBT not nbt, because kubejs uses nbt for a different purpose. A bit confusing, but it is what it is.
Item Entities
There are two ways to create item entities in KubeJS.
popItem
If you want to easily create the item from a certain block then you can use the popItem method.
Example
block.popItem('minecraft:diamond')The item can be an Item.of() instead if you wish
createEntity("item")
Creating an item entity with a little more control be done identically to any other entity, except you get a couple more methods.
Example
let itemEntity = block.createEntity("item")
itemEntity.y+=0.8
itemEntity.x+=0.5
itemEntity.z+=0.5
itemEntity.item = Item.of("encahanted_book").enchant("thorns",2)
itemEntity.item.count = 1
itemEntity.pickupDelay = 600
itemEntity.noGravity = true
itemEntity.motionY = 0.08
itemEntity.spawn()
In this example
- the .item beaned method is used to set the item of the item stack (Required)
- the .pickupDelay beaned method is used to set the pickup delay (Optional)
Examples
Spawns an endermite when braking dirt with a 5% chance
onEvent("block.break", event => {
	if (event.block.id != "minecraft:dirt" || Math.random()  > 0.05) return
  	//only if its dirt and only has 5% chance
  	let myEndermite = event.block.createEntity("endermite")
  	myEndermite.x += 0.5
  	myEndermite.y += 0.5
  	myEndermite.z += 0.5
  	myEndermite.spawn()
})
Turns gravel to sand and drops clay when right clicked with flint
onEvent('block.right_click', event => {
  if (event.block.id == 'minecraft:gravel' && event.item.id == 'minecraft:flint') {
    event.block.set('sand')
    event.item.count--
    event.block.popItem('clay')
  }
})
Overrides enchanting table behavior when clicking on it with an item in you hand. Instead will make the item float up a while, then fall back down.
onEvent('block.right_click', event => {
    if (event.block.id !='minecraft:enchanting_table') return
    if (event.item.count == 0) return
  	event.cancel()
    let item = event.item.copy()
    //if did not use .copy() the item would still be referencing the one in the hand, so setting the count to 1 would set the count in the hand to 1
    item.count = 1
  	event.item.count--

    let itemEntity = event.block.createEntity('item')
    itemEntity.y+=0.8 // on the top of the encahnting table, not in it
    itemEntity.x+=0.5
    itemEntity.z+=0.5
    itemEntity.item = item
    itemEntity.item.count = 1
    itemEntity.pickupDelay = 100
    itemEntity.noGravity = true
    itemEntity.motionY = 0.08
    itemEntity.spawn()

  	function callback (i) {
    	//changes the scope of itemEntity (otherwise if used 2 times in a row within 5 seconds, problems would occur)
    	event.server.scheduleInTicks(100, callback => { // this code runs 5 seconds later
    		i.noGravity = false
    	})
    }
  	callback(itemEntity)
})
Classes
Available fields and methods and examples on how to use them
Object
Parent class of all Java objects.
Parent
None (and itself at the same time, don't question it)
Variables and Functions
| Name | Type | Info |
| toString() | String | Tag collection type. |
| equals(Object other) | boolean | Checks equality with another object. |
| hashCode() | int | Hash code of this object. It is used to optimize maps and other things, should never be used for object equality. |
| class | Class | Object's type/class. |
String
Class of string objects, such as "abc" (and in JS 'abc' works as well)
Parent
Variables and Functions
| Name | Type | Info |
| empty | boolean | Returns if string is empty a.k.a string === '' |
| toLowerCase() | String | Returns a copy of this string, but with all characters in upper case |
| toUpperCase() | String | Returns a copy of this string, but with all characters in lower case |
| equalsIgnoseCase(String other) | boolean | Hash code of this object. It is used to optimize maps and other things, should never be used for object equality. |
| length() | int | Number of characters |
| charAt(int index) | char | Single character at index |
Primitive Types
Information
Primitive types are objects that don't have a real class and don't inherit methods from Object.
All primitive types
| Type | Java class | Info |
| void | Void | No type |
| byte | Byte | 8 bit decimal number. |
| short | Short | 16 bit decimal number. |
| int | Integer | 32 bit decimal number, most common decimal type. |
| long | Long | 64 bit decimal number. |
| float | Float | 32 bit floating point number. |
| double | Double | 64 bit floating point number. |
| char | Character | Single character in String such as 'a' or '-'. |
| boolean | Boolean | Only true and false values. Can be checked in if function without comparing to true, as if (x) or if (!x) instead of if (x == true) or if (x == false). |
Global
Constants, classes and functions
Components, KubeJS and you!
In 1.18.2 and beyond KubeJS uses Components in a lot of places. It returns them for entity names, item names and accepts them for everything from tooltips to sending messages to players.
All examples use event.player.tell from the player.chat event to output their example, but they will with anywhere that accepts a Component!
Making your own Components starts from the ComponentWrapper class, invokable with just Component or Text from anywhere. The examples all use Component but Text works just the same.
ComponentWrapper methods:
|
Name |
Return Type | Info |
| of(Object o) | MutableComponent | Returns a component based on what was input. Accepts strings, primitives like numbers, snbt/nbt format of Components and a couple others. |
| clickEventOf(Object o) | ClickEvent | Returns a ClickEvent based on what was input. See examples below |
| prettyPrintNbt(Tag tag) | Component | Returns a component with a prettified version of the input NBT. |
| join(MutableComponent seperator, Iterable<? extends Component> texts) | MutableComponent | Returns the result of looping through texts and joining them, separating each one with seperator. |
| string(String text) | MutableComponent | Returns a basic unformatted TextComponent with just the input text |
| translate(String key) | MutableComponent | Returns a basic unformatted TranslatableComponent with the input key. |
| translate(String key, Object... objects) | MutableComponent | Returns an unformatted TranslatableComponent with objects as the replacements for %s in the translation output. |
| keybind(String keybind) | MutableComponent | Returns a basic unformatted KeybindComponent with the specified keybind. |
| <color>(Object text) | MutableComponent |
Returns a basic Component with the specified color for text coloring. Valid colors are in the list below. Do not include the <> brackets. |
A list of colors accepted in various places:
- black
- darkBlue
- darkGreen
- darkAqua
- darkRed
- darkPurple
- gold
- gray
- darkGray
- blue
- green
- aqua
- red
- lightPurple
- yellow
- white
Basic examples:
onEvent('player.chat', event => {
  // Tell the player a normal message
  event.player.tell(Component.string('Hello world'))
  // Now in black
  event.player.tell(Component.black('Welcome to the dark side, we have cookies!'))
  // Tell them the diamond item, in whatever language they have set
  event.player.tell(Component.translate('item.minecraft.diamond'))
  // Now tell them whatever key they have crouching set to
  event.player.tell(Component.keybind('key.sneak'))
  // And finally show them the nbt data of the item they are holding
  event.player.tell(Component.prettyPrintNbt(event.player.mainHandItem.nbt))
})
MutableComponent
These are methods you can call on any MutableComponent. This includes ComponentKJS, which is a KubeJS extension for vanilla's components and is injected into vanillas code on runtime. All methods from ComponentKJS are included, but only relevant ones from vanilla are included.
|
Name |
Return Type | Info |
| iterator() | Iterator<Component> | Returns an Iterator for the components contained in this component, useful for when multiple have been joined or appended. From ComponentKJS. |
| self() | MutableComponent | Returns the component you ran it on. From ComponentKJS. |
| toJson() | JsonElement | Returns the Json representation of this Component. From ComponentKJS. |
| <color>() | MutableComponent | Modifies the Component with the specified color applied as formatting, and returns itself. Do not include the <> brackets. From ComponentKJS. |
| color(Color c) | MutableComponent | Modifies the Component to have the input Color, and returns itself. (Color is a Rhino color). From ComponentKJS. |
| noColor() | MutableComponent | Modifies the Component to have no color, and returns itself. From ComponentKJS. |
|
bold() italic() underlined() strikethrough() obfuscated() |
MutableComponent | Modifies the Component to have said formatting and returns itself. From ComponentKJS. |
|
bold(@Nullable Boolean value) italic(@Nullable Boolean value) underlined(@Nullable Boolean value) strikethrough(@Nullable Boolean value) obfuscated(@Nullable Boolean value) |
MutableComponent | Modifies the Component to have said formatting and returns itself. From ComponentKJS. |
| insertion(@Nullable String s) | MutableComponent | Makes the Component insert the specified string into the players chat box when shift clicked (does not send it) and returns itself. From ComponentKJS. |
| font(@Nullable ResourceLocation s) | MutableComponent | Changes the Components font to the specified font and returns itself. For more information on adding fonts see the Minecraft Wiki's Resource packs page. From ComponentKJS. |
| click(@Nullable ClickEvent s) | MutableComponent | Sets this components ClickEvent to the specified ClickEvent. From ComponentKJS. |
| hover(@Nullable Component s) | MutableComponent | Sets the hover tooltip for this Component to the input Component. From ComponentKJS. |
| setStyle(Style style) | MutableComponent | Sets the style to the input Style (net.minecraft.network.chat.Style) and returns itself. Not recommended for use, use the specific methods added by CompontentKJS instead. |
| append(String string) | MutableComponent | Appends the input string as a basic TextComponent to this Component then returns itself. |
| append(Component component) | MutableComponent | Appends the input Component to this Component then returns itself. |
| withStyle(Style style) | MutableComponent | Merges the input style with the current style, preffering properties from the new style if a conflict exists. |
| getStyle() | Style | Returns this Components current Style. |
| getContents() | MutableComponent | Returns this Components contents. Will return the text for TextComponents, the pattern for SelectorComponents and an empty string for all other Components. |
| getSiblings() | List<Component> | Returns a list of all Components which have been append()ed to this Component |
| plainCopy() | BaseComponent | Returns a basic copy of this, preserving only the contents and not the style or siblings. |
| copy() | MutableComponent | Returns a full copy of this Component, preserving style and siblings |
| getString() | String | Returns this components text as a String. Will return a blank string for any non-text component |
More complex examples:
// First a prefix, like a rank. This won't be changing so we can just declare it up here.
const prefix = Component.darkRed('[Admin]').underlined()

onEvent('player.chat', event => {

  // First cancel the event because we are going to be sending the message ourselves
  event.cancel()

  // The main Component we will be adding stuff to. It is just a copy of the prefix component for now
  let component = prefix.copy() // If we didn't copy it all the modifications we made to it would be applied to the original as well!

  // Make a component of the players name and then surround with < > and make it white again. Then append it our main copmponent.
  // A component will inherit any styiling it doesnt have from whatever it has been .append()ed to, so you need to apply formatting	rather liberally some times!
  let playerName = Component.string(event.getUsername())
  // Doing it this way means we only have to apply the white formatting and no underline once to the name
  let nameComponent = Component.white(' <').underlined(false).append(playerName).append('> ')
  component.append(nameComponent)

  // Finnally add the message (obfuscated, of course) and send it!
  // We make sure to set its color and underline though, otherwise it will end up inheriting the red and underline from the prefix!
  component.append(Component.string(event.message).obfuscated().white().underlined(false))
  event.server.tell(component)

}) Item and Ingredient
When making recipes you can specify items in many ways, the most common is just to use 'namspace:id', like 'minecraft:diamond', however you can also use Item#of and Ingredient#of for advanced additions, such as NBT or count.
Note that Item and Ingredient are not the same! They may work similarly but there are differences. Item can only ever represent a single item type whereas Ingredient can represent multiple item types (and multiple instances of the same item type with different properties such as NBT data). For most cases Ingredient should be preferred over Item.
Item/ItemWrapper
Its Java class name is ItemWrapper but it is bound to Item in JS.
|
Name |
Return Type | Info |
| of(ItemStackJS in) | ItemStackJS |
Returns an ItemStackJS based on what was input. Note that this relies mostly on Rhinos type wrapping to function, see paragraph below about ItemStackJS#of for more info |
| of(ItemStackJS in, int count) | ItemStackJS |
See above. count will override any other count set from the first parameter. |
| of(ItemStackJS in, CompoundTag tag) | ItemStackJS |
See above. NBT is merged, with the input NBT taking priority over existing NBT. |
| of(ItemStackJS in, int count, CompoundTag nbt) | ItemStackJS |
Combines the functionality of the above two. |
| withNBT(ItemStackJS in, CompoundTag nbt) | ItemStackJS |
Same as the corresponding #of. |
| withChance(ItemStackJS in, double chance) | ItemStackJS |
Same as #of, chance will override currently set chance. |
| getList() | ListJS |
Returns a list of ItemStackJS, one per registered item. |
| getTypeList() | ListJS |
Returns a list of String, one per registered item. |
| getEmpty() | ItemStackJS |
Returns ItemSTackJS.EMPTY |
| clearListCache() | void |
Clears the caches used for #getList and #getTypeList |
| fireworks(Map<String, Object> properties) | FireworkJS |
Returns a FireworkJS based on the input map of propeties. See FireworkJS#of on the FireworkJS page for more information <TODO: Make and link FireworkJS page> |
| getItem(ResourceLocation id) | Item |
Returns the instance of the Item class associated with the item id passed in. |
| @Nullable findGroup(String id) | CreativeModTab |
Returns the Creative tab associated with the id passed in, returns null if none found. |
| exists(ResourceLocation id) | boolean |
Returns if the item id passed in exists or not. |
| isItem(@Nullable Object o) | boolean |
Just does an instanceof ItemStackJS check on the object passed in. |
Item#of relies on Rhinos type wrapping to function, which calls ItemStackJS#of. This tries its best to turn the input into an ItemStackJS. If no match is found ItemStackJS.EMPTY is returned. Valid inputs:
- null/ItemStack.EMPTY/Items.EMPTY/ItemStackJS.EMPTY - will return ItemStackJS.EMPTY
- ItemStackJS - will return the same object passed in.
- FluidStackJS - will return a new DummyFluidItemStackJS
- IngredientJS - will return the first item in the Ingredient
- ItemStack - will return a new ItemStackJS wrapping the ItemStack passed in
- ResourceLocation - will lookup this ResourceLocation in the item registry and return it if found. If not found will return ItemStackJS.EMPTY, and throw an error if RecipeJS.itemErrors is true
- ItemLike - will return a new ItemStackJS of the input
- JsonObject - will return an item based on properties in the Json.
itemwill be used as the item id, ortagif item does not exist.count,chanceandnbtall set their respective properties - RegEx - will return a new ItemStackJS of the first item id that matches this regex.
- String (CharSequence) - will parse it and return a new ItemStackJS based on the input item id. Prefix with
nxto change the count (where n is any number between 1 and 64). Put#before the item id to parse it as a tag instead. Put@before the item id to parse it as a modid instead. Prefix with%to parse it as a creative menu tab group. Surround in/to parse as a RegEx. NOTE: will only be the first item in any of the groups mentioned above! - Map/JS Object - uses the same rules as a JsonObject.
Ingredient/IngredientWrapper
Its Java class name is IngredientWrapper but it is bound to Ingredient in JS. All static methods.
|
Name |
Return Type | Info |
| getNone() | IngredientJS |
Returns ItemStack.EMPTY |
| getAll() | IngredientJS |
Returns an IngredientJS of every single item in game. All of them. |
| of(Object object) | IngredientJS |
Works exactly the same as Item#of except it recognises Ingredient and forge json ingredient syntax. |
| of(Object object, int count) | IngredientJS |
Same as above. The count passed in will override any from the first parameter. |
| custom(Predicate<ItemStackJS> predicate) | IngredientJS |
Takes the arrow function or anonymous function passed in and makes an IngredientJS with that as IngredientJS#test. Return true from the function if the ItemStackJS passed should match as an ingredient. |
| custom(IngredientJS in, Predicate<ItemStackJS> predicate) | IngredientJS |
Same as above except it must match the IngredientJS passed in as the first parameter before the custom function is called. |
| customNBT(IngredientJS in, Predicate<CompoundTag> predicate) | IngredientJS |
Same as above except the Predicate is passed the items NBT instead of the full ItemStackJS. Useful for advanced NBT matching. |
| matchAny(Object objects) | IngredientJS |
Adds the passed in object to an ingredient. If it is a list then it adds all items in the list. All objects are passed through #of before adding. |
| registerCustomIngredientAction(String id, CustomIngredientActionCallback callback) | void |
Registers a custom ingredient action. See the recipe page for more information. |
| isIngredient(@Nullable Object o) | boolean |
Just does an instanceof IngredientJS check on the object passed in. |
Remember that Item and Ingredient are not equivalent!
Examples
<TODO: examples>ItemStackJS
A wrapper class for vanilla's ItemStack. All methods listed here are instance methods, all useful static methods are wrapped in ItemWrapper. Implements IngredientJS and overrides most of its default methods.
|
Name |
Return Type | Info |
| getItem() | Item | Returns the instance of the Item class associated with this ItemStackJS. |
| getItemStack() | ItemStack |
Returns the vanilla ItemStack that this wraps. |
| getId() | String |
Returns the item id associated with this ItemStackJS in the form mod_name:item_name |
| getTags() | Colletion<ResourceLocation> |
Returns all item tags the item has. (NOT NBT tags). |
| hasTag(ResourceLocation tag) | boolean |
Returns if the item has the input tag or not. |
| copy() | ItemStackJS |
Returns a copy of this ItemStackJS. |
| setCount(int count) | void |
Sets the count on this ItemStackJS. |
| getCount() | int |
Gets the count. |
| withCount() | ItemStackJS |
Returns a copy of this ItemStackJS with a different count. |
| isEmpty() | boolean |
Returns if this is an empty item or not. |
| isInvalidRecipeIngredient() | boolean |
Returns if this is a valid recipe ingredient. |
| isBlock() | boolean |
Returns if this item is a BlockItem, that is it can be placed and form a block. |
| @Nullable getNbt() | CompoundTag |
Gets this items NBT data. |
| setNbt(@Nullable CompoundTag tag) | void |
Sets this items NBT data |
| hasNBT() | boolean |
Returns if this item has NBT data. |
| getNbtString() | String |
Returns this items NBT data as a string. If you want to display it to the player see Text#prettyPrintNbt. |
| removeNBT() | ItemStackJS |
Returns a copy with no NBT data. |
| withNBT(CompoundTag nbt) | ItemStackJS |
Returns a copy with the specified NBT data. Any tags from the original NBT are kept if not overwritten by the NBT passed in. |
| hasChance() | boolean |
Returns if the ItemStackJS has a chance. |
| removeChance() | void |
Removes the chance from this ItemStackJS. |
| setChance(double c) | void |
Sets the chance for this ItemStackJS. |
| getChance() | double |
Returns the chance. |
| withChance(double c) | ItemStackJS |
Returns a copy with the chance passed in, unless the chance passed in is the same as the current chance, in which case it returns this. |
| getName() | Components |
Returns this items name. Probably a Translateable Component unless its been overridden by something else (ie method below). |
| withName(@Nullable Component displayName) | ItemStackJS |
Returns a copy with a different display name set. |
| toString() | String |
Returns a string representing this ItemStackJS. The same method used for the |
| test(ItemStackJS other) | boolean |
Returns if this ItemStackJS equals another one. Tests for item type and NBT data. |
| testVanilla(ItemStack other) | boolean |
Returns if this ItemStackJS equals the passed in ItemStack. Tests for item type and NBT data. |
|
testVanillaItem(Item item) |
boolean |
Returns if the Item passed in is the same as this ItemStackJS's Item. Basically checks they are the same item type. |
| getStacks() | Set<ItemStackJS> |
Returns this ItemStackJS as the only entry in a Set. |
| getVanillaItems() | Set<Item> |
Returns this ItemStackJS associated Item as the only entry in a Set. |
| getFirst() | ItemStackJS |
Retuns a copy of this ItemStackJS |
| hashCode() | int |
Returns a hash code of the Item and NBT data. |
| equals(Object o) | boolean |
Returns if this is equal to the input object. |
| strongEquals(Object o) | boolean |
Returns if this is equal to the input object. Checks count as well. |
| getEnchantments() | MapJS |
Returns a MapJS of this itemStackJS enchament id's to their level. |
| hasEnchantment(Enchantment enchantment, int level) | boolean |
Returns if this ItemStackJS is enchanted with a minimum of the passed in enchantment level. |
| enchant(MapJS enchantments) | ItemStackJS |
Enchants a copy of this ItemStackJS with the MapJS passed in (it should be a map of enchantment ids to levels), then returns the copy. |
| enchant(Enchantment enchantment, int level) | ItemStackJS |
Enchants a copy of this item with the passed in Enchantment at the specified level, then returns the copy. |
| getMod() | String |
Returns the mod id of the mod this item is from. |
| ignoreNBT() | IngredientJS |
Returns a new IgnoreNBTIngredientJS of this item. |
| weakNBT() | IngredientJS |
Returns a new WeakNBTIngredientJS of this item. |
| areItemsEqual(ItemStackJS other) | boolean |
Returns if this item type is equal to the item type of the passed in ItemStackJS |
| areItemsEqual(ItemStack other) | boolean |
Returns if this item type is equal to the item type of the passed in ItemStack |
| isNBTEqual(ItemStackJS other) | boolean |
Returns if the NBT of this ItemStackJS is equal to the NBT of the ItemStackJS passed in. |
| isNBTEqual(ItemStack other) | boolean |
Returns if the NBT of this ItemStackJS is equal to the NBT of the ItemStack passed in. |
| getHarvestSpeed(@Nullable BlockContainerJS block) | float |
Returns the mining speed of this ItemStackJS if used to mine the passed in BlockContainerJS |
| getHarvestSpeed() | float |
Returns this items default mining speed |
| toJson()
toResultJson() toRawResultJson() |
JsonElement |
Returns a Json representation of this ItemStackJS. They all appear to work almost identically. |
| toNBT() | CompoundTag |
Returns an NBT representation of this ItemStackJS, the same sort that vanilla uses to store items in blocks. |
| onChanged(@Nullable Tag o) | void |
Sets the items NBT data to the tag passed in, only if it is a CompoundTag or null. |
| getItemGroup() | String |
Returns the name of the creative tab this item belongs in. An empty string if it does not exist in the creative tabs (like a jigsaw block). |
| getItemIds() | Set<String> | Returns a set with this items id as the only entry. |
| getFluidStack() | FluidStackJS | Returns null, by default. Overriden by some superclasses to return the FluidStackJS that this item represents. |
| getTypeData() | CompoundTag | Unknown purpose. |
<TODO: Examples>Other
Examples and how-tos of other things KubeJS can do!
Changing Window Title and Icon
Yes, you can do that with KubeJS too.
To change title, all you have to do is change title in kubejs/config/client.properties.
To change icon, you create a kubejs/config/packicon.png image in standard Minecraft texture size preferably (64x64, 128x128, 256x256, that kind of size).
The image has to be saved as 32-bit PNG, not Auto-detect/24-bit, otherwise you will get a JVM crash!
Here's how to do that in PaintNET:
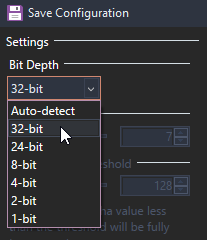
Example result:


Currently incompatible with Fancy Menu!
Loading Assets and Data
You can also use KubeJS to load assets from resource packs and data from datapacks! While this isn't the only method, its one of the easiest. Other options are loading datapack jsons programmatically <TODO: one for assets>.
The kubejs/data folder is loaded identically to the pack/data folder in a datapack and the kubejs/assets folder is loaded identically to the pack/assets folder in a resourcepack.
Step by step for importing Datapacks and Resourcepacks
- Make sure that you have permission from creator of the resourcepack or datapack to have their word embedded in your pack
- If your resourcepack or datapack is a
.zipfile, unzip it - Inside there should be a file and a folder named either
dataorassets, go into that folder - In you
kubejsfolder in your instance their should be a folder with the same name as you just found - Transfer the contents (1 or more folders) from the resourcepack or datapack to the one inside of kubejs
Different places to put things that you should know
kubejs/assets/kubejs/textures/itemwhere you put item textures (png) and mcmeta fileskubejs/assets/kubejs/textures/blockwhere you put block textures (png) and mcmeta fileskubejs/assets/kubejs/textures/fluidwhere you put fluid textures (png) and mcmeta fileskubejs/assets/kubejs/models/blockwhere you put block models files (json)kubejs/assets/kubejs/models/itemwhere you put item models files (json)kubejs/assets/kubejs/soundswhere you put sounds (ogg)kubejs/assets/kubejs/sounds.jsonwhere you do client sound registry
How to change the textures models or what ever else of other mods
- Find the mod jar and extract it (you might need to rename to a zip temporarily if you don't have the right tools)
- Inside you should find
assetsanddatafolder inside should a folder with the mod then further sub folders and various assets and data-s - For example
example-v3.42.5.jar/assets/example/textures/item/foo/thingggy.png - Now make this exact folder path in the kubejs folder
kubejs/assets/example/textures/item/foo/thingggy.png, but use a different image (or whatever)
Default Options
You can ship default options from options.txt with KubeJS. This includes keybindings, video settings, enabled resource packs, controls like autojump and toggle sprint and wierd things like advanced tooltips.
Why use this instead of just shipping options.txt? If you ship options.txt then the users options will get overridden every time they update your modpack, where-as KubeJS only sets the options once, on the first time the modpack boots.
To use it simply make a file called defaultoptions.txt in the kubejs/config folder. Then copy any lines you want to set by default over from the normal options.txt file. You can also just copy the entire file if you want to include everything.
A full list of what options the options.txt file can contain is available on the Minecraft Wiki: https://minecraft.fandom.com/wiki/Options.txt
Addons
Scripts using various KubeJS addons for recipes.
KubeJS UI
You can also always look at existing modpack using KubeJS UI to see how they do it
onEvent('ui.main_menu', event => {
  event.replace(ui => {
    //ui.background('kubejsui:textures/example_background.png')
    ui.tilingBackground('kubejsui:textures/example_background.png', 256)
    ui.minecraftLogo(30)

    ui.button(b => {
      b.name = 'Test'
      b.x = 10
      b.y = 10
      b.action = 'minecraft:singleplayer'
    })

    ui.button(b => {
      b.name = 'Test but in bottom right corner'
      b.x = ui.width - b.width - 10
      b.y = ui.height - b.height - 10
      b.action = 'https://feed-the-beast.com/'
    })

    ui.label(l => {
      l.name = Text.yellow('FTB Stranded')
      l.x = 2
      l.y = ui.height - 12
      l.action = 'https://feed-the-beast.com/'
    })

    ui.image(i => {
      i.x = (ui.width - 40) / 2
      i.y = (ui.height - 30) / 2
      i.width = 40
      i.height = 30
      i.action = 'https://feed-the-beast.com/'
    })

    ui.label(l => {
      l.name = Text.aqua('Large label')
      l.x = 100
      l.y = ui.height - 20
      l.height = 15
      l.shadow = true
    })
  })
})KubeJS Thermal
You can use KubeJS Thermal to add recipes to a lot of the machines from the Thermal Series.
Tip: you can use Ctrl/Cmd + F to search this page for the machine you are looking for.
onEvent('recipes', event => {
    // Redstone Furnace
    // Turn four coal into one diamond
    event.recipes.thermal.furnace('minecraft:diamond', '4x minecraft:coal')
    // Dried kelp to leather, with a high energy cost
    event.recipes.thermal.furnace('minecraft:leather', 'minecraft:dried_kelp').energy(20000)

    // Sawmill
    // Input one oak leaf and have a 5% chance of an apple, and 10% of a sapling
    event.recipes.thermal.sawmill([Item.of('minecraft:apple').withChance(0.05), Item.of('minecraft:oak_sapling').withChance(0.1)], 'minecraft:oak_leaves')
    // Turn an acacia slab into 4 buttons
    event.recipes.thermal.sawmill('4x minecraft:acacia_button', 'minecraft:acacia_slab')

    // Pulverizer
    // Turn any leaf block into 4 sticks with a 50% chance of a fifth. Has a low energy cost.
    event.recipes.thermal.pulverizer(Item.of('minecraft:stick').withChance(4.5), '#minecraft:leaves').energy(100)
    // Pulverise a flint into an iron nugget with a 10% chance of a second
    event.recipes.thermal.pulverizer(Item.of('minecraft:iron_nugget').withChance(1.1), 'minecraft:flint')

    // Induction Smelter
    // Turn one coal block into 4 diamonds with a 50% chance of a fifth
    event.recipes.thermal.smelter(['4x minecraft:diamond', Item.of('minecraft:diamond').withChance(0.5)], 'minecraft:coal_block')
    // Turn an iron ingot and a copper ingot into a gold ingot and require 10,000 FE
    event.recipes.thermal.smelter('minecraft:gold_ingot', ['minecraft:iron_ingot', 'minecraft:copper_ingot']).energy(10000)

    // Centrifugal Separator
    // Centrifuge one sapling into 50% chance of a stick and 300mb of water
    event.recipes.thermal.centrifuge([Item.of('minecraft:stick').withChance(0.5), Fluid.of('minecraft:water', 300)], '#minecraft:saplings')
    // Turn 2 sweet berries into red dye
    event.recipes.thermal.centrifuge('minecraft:red_dye', '2x minecraft:sweet_berries')

    // Multiservo Press
    // Press seven bonemeal into a bone.
    event.recipes.thermal.press('minecraft:bone', '7x minecraft:bone_meal')
    // Press an iron dust into an iron nugget using the coin die. To use an item as a die they must have the thermal:crafting/dies tag!
    event.recipes.thermal.press('minecraft:iron_nugget', ['#forge:dusts/iron', 'thermal:press_coin_die'])

    // Magma Crucible
    // Turn a sapling into 400mb of water
    event.recipes.thermal.crucible(Fluid.of('minecraft:water', 400), '#minecraft:saplings').energy(100)
    // Melt ores into lava
    event.recipes.thermal.crucible(Fluid.of('minecraft:lava', 500), '#forge:ores')

    // Blast Chiller
    // Chill an arrow into an arrow of slowness
    event.recipes.thermal.chiller(Item.of('minecraft:tipped_arrow', '{Potion:"minecraft:slowness"}'), [Fluid.of('minecraft:water', 100), 'minecraft:arrow'])
    // Chill lava into raw iron using the ball cast. For an item to count as a cast it needs to have the thermal:crafting/casts tag!
    event.recipes.thermal.chiller('minecraft:raw_iron', [Fluid.of('minecraft:lava', 1000), 'thermal:chiller_ball_cast'])

    // Fractionating Still
    // Refine Creosete oil into Tree oil and latex, with a chance of producing rubber
    event.recipes.thermal.refinery([Item.of('thermal:rubber').withChance(0.8), Fluid.of('thermal:tree_oil', 100), Fluid.of('thermal:latex', 50)], Fluid.of('thermal:creosote', 200))
    // Refine tree oil into a small amount of refined fuel with a high energy cost
    event.recipes.thermal.refinery(Fluid.of('thermal:refined_fuel', 50), Fluid.of('thermal:tree_oil', 100)).energy(20000)
    // Unbrew an awkward potion. This uses the cofh core potion fluid with some nbt.
    event.recipes.thermal.refinery([Fluid.of('minecraft:water', 1000), 'minecraft:nether_wart'], Fluid.of('cofh_core:potion', 1000, '{Potion:"minecraft:awkward"}'))

    // Alchemical Imbuer
    // Combine a redstone dust and 200mb of lava to make 200mb of destabilized redstone
    event.recipes.thermal.brewer(Fluid.of('thermal:redstone', 200), [Fluid.of('minecraft:lava', 200), 'minecraft:redstone'])
    // Brew an uncraftable potion (potion with no nbt) with 64 bedrock and an awkward potion. Oh, and an insane energy cost
    event.recipes.thermal.brewer(Fluid.of('cofh_core:potion', 1000), [Fluid.of('cofh_core:potion', 1000, '{Potion:"minecraft:awkward"}'), '64x minecraft:bedrock'])

    // Fluid Encapsulator
    // Fill a sponge with water. Why? Well why not?
    event.recipes.thermal.bottler('minecraft:wet_sponge', [Fluid.of('minecraft:water', 10000), 'minecraft:sponge'])
    // Turn any gear into a machine frame by filling it with destabilized redstone. Nice and low energy cost too
    event.recipes.thermal.bottler('thermal:machine_frame', ['#forge:gears', Fluid.of('thermal:redstone', 500)]).energy(500)
})KubeJS Create
Create integration for KubeJS. This mod allows you to add and properly edit recipes of Create mod in KubeJS scripts. All supported recipe types and examples are below. See Recipes page for more info.
Simple Recipe Types
- createCrushing
- createCutting
- createMilling
- createBasin
- createMixing
- supports .heated() and .superheated()
- createCompacting
- supports .heated() and .superheated()
- Can have any number of inputs
- Used basin
- createPressing
- Only has one item input
- Used on any surface
- createSandpaperPolishing
- createSplashing
- AKA Bulk Washing
- createDeploying
- createFilling
- createEmptying
-
createHaunting
Bulk Smoking and Bulk Blasting recipes are auto generated from vanilla smelting, smoking, and blasting recipes.
- Bulk Smoking is vanilla smoking.
- Bulk Blasting is vanilla smelting (as long as there is not a smoking recipe) or vanilla blasting.
Syntax
event.recipes.create.mixing(output[], input[])
or
event.recipes.createMixing(output[], input[])
Output can be an item, fluid, or an array of multiple.
Input can be an ingredient, fluid, or an array of multiple.
Examples
onEvent('recipes', event => {
	event.recipes.createCrushing([
		'2x bone_meal',
		Item.of('5x bone_meal').withChance(0.5)
	], 'bone_block')

	event.recipes.create.mixing(Fluid.of('create:builders_tea',500),[
		Fluid.of('milk',250),
 	 	Fluid.of('water',250),
		'#leaves'
	]).heated()

	event.recipes.createFilling('create:blaze_cake', [
		'create:blaze_cake_base',
		Fluid.of('minecraft:lava', 250)
	])

	event.recipes.createEmptying([
		'minecraft:glass_bottle',
		Fluid.of('create:honey', 250)
	], 'minecraft:honey_bottle')
})
Mechanical Crafter
Syntax
event.recipes.create.mechanicalCrafting(output, pattern[], {patternKey: input})
or
event.recipes.createMechanicalCrafting(output, pattern[], {patternKey: input})
This recipe type is the same as regular crafting table shaped recipe, however the pattern can be up to 9x9, instead of 3x3.
Examples
onEvent('recipes', event => {
	event.recipes.createMechanicalCrafting('minecraft:piston', [
		'CCCCC',
		'CPIPC',
		'CPRPC'
	], {
		C: '#forge:cobblestone',
		P: '#minecraft:planks',
		R: '#forge:dusts/redstone',
		I: '#forge:ingots/iron'
	})
})
Sequenced Assembly
Syntax
event.recipes.create.sequencedAssembly(output[], input, sequence[]).transitionalItem(transitionalItem).loops(loops)
or
event.recipes.createSequencedAssembly(output[], input, sequence[]).transitionalItem(transitionalItem).loops(loops)
Output is an item or an array of items.
If it is an array:
- The first item is the real output, the remainder are scrap.
- Only one item is chosen, with equal chance of each.
- You can use
Item.of('create:shaft').withChance(2)to double the chance of that specific item to being chosen.
Input is an ingredient.
Transitional Item is any item* and is used during the intermediate stages of the assembly.
Sequence is an array of recipes.
- The only legal recipes are:
- createCutting
- createPressing
- createDeploying
- createFilling
- The transitional item needs to be the output of each of these recipes.
- The transitional item needs to be the an input of each of these recipes.
Loops is the number of time that the recipes repeats. Calling .loops() is optional, and defaults to 4.
Examples
onEvent('recipes', event => {
	event.recipes.createSequencedAssembly([ // start the recipe
		Item.of('create:precision_mechanism').withChance(130.0), // this is the item that will appear in JEI as the result
		Item.of('create:golden_sheet').withChance(8.0), // the rest of these items will part of the scrap
		Item.of('create:andesite_alloy').withChance(8.0),
		Item.of('create:cogwheel').withChance(5.0),
		Item.of('create:shaft').withChance(2.0),
		Item.of('create:crushed_gold_ore').withChance(2.0),
		Item.of('2x gold_nugget').withChance(2.0),
		'iron_ingot',
		'clock'
	],'create:golden_sheet',[ // 'create:golden_sheet' is the input
		// the transitional item set by "transitionalItem('create:incomplete_large_cogwheel')" is the item used during the intermediate stages of the assembly
		event.recipes.createDeploying('create:incomplete_precision_mechanism',['create:incomplete_precision_mechanism','create:cogwheel']),
 	 	// like a normal recipe function, is used as a sequence step in this array. Input and output have the transitional item
		event.recipes.createDeploying('create:incomplete_precision_mechanism',['create:incomplete_precision_mechanism','create:large_cogwheel']),
		event.recipes.createDeploying('create:incomplete_precision_mechanism',['create:incomplete_precision_mechanism','create:iron_nugget'])
	]).transitionalItem('create:incomplete_precision_mechanism').loops(5) // set the transitional item and the loops (amount of repetitions)


	// for this code to work, kubejs:incomplete_spore_blossom need to be added to the game
	let inter = 'kubejs:incomplete_spore_blossom' // making a varrible to store the transition item makes the code more readable
	event.recipes.createSequencedAssembly([
			Item.of('spore_blossom').withChance(16.0), // this is the item that will appear in JEI as the result
			Item.of('flowering_azalea_leaves').withChance(16.0), // the rest of these items will part of the scrap
			Item.of('azalea_leaves').withChance(2.0),
			'oak_leaves',
			'spruce_leaves',
			'birch_leaves',
			'jungle_leaves',
			'acacia_leaves',
			'dark_oak_leaves'
		],'flowering_azalea_leaves', [ // 'flowering_azalea_leaves' is the input
			// the transitional item is a varrible, that is "kubejs:incomplete_spore_blossom", and is used during the intermediate stages of the assembly
			event.recipes.createPressing(inter, inter),
			// like a normal recipe function, is used as a sequence step in this array. Input and output have the transitional item
			event.recipes.createDeploying(inter, [inter, 'minecraft:hanging_roots']),
			event.recipes.createFilling(inter, [inter, Fluid.of('minecraft:water',420)]),
			event.recipes.createDeploying(inter, [inter, 'minecraft:moss_carpet']),
  			event.recipes.createCutting(inter, inter)
		]).transitionalItem(inter).loops(2) // set the transitional item and the loops (amount of repetitions)
})
Transitional Items
As mentioned earlier, any item can be a transition item. However, this is not completely recommended.
If you wish to make your own transitional item, its best if you make the type create:sequenced_assembly.
1.16 syntax
onEvent('item.registry', event => {
	event.create('incomplete_spore_blossom').displayName('Incomplete Spore Blossom').type('create:sequenced_assembly')
})
1.18 syntax
onEvent('item.registry', event => {
	event.create('incomplete_spore_blossom','create:sequenced_assembly')
})
Mysterious Conversion
Mysterious Conversion recipes are client side only, so the only way to add them currently is using reflection.
Example
Goes inside of client scripts and not in an event.
//makes the varribles used
let MysteriousItemConversionCategory = java('com.simibubi.create.compat.jei.category.MysteriousItemConversionCategory')
let ConversionRecipe = java('com.simibubi.create.compat.jei.ConversionRecipe')

//adds in the recipes
MysteriousItemConversionCategory.RECIPES.add(ConversionRecipe.create('minecraft:apple', 'minecraft:carrot'))

MysteriousItemConversionCategory.RECIPES.add(ConversionRecipe.create('minecraft:golden_apple', 'minecraft:golden_carrot'))
Preventing Recipe Auto-Generation
If you don't want a smelting, blasting, smoking, crafting, or stone-cutting to get an auto-generated counter part, then include manual_only at the end of the recipe id.
Example
onEvent('recipes', event => {
	event.shapeless('wet_sponge',['water_bucket','sponge']).id('kubejs:moisting_the_sponge_manual_only')
})
Other types of prevention, can be done in the create config (the goggles button leads you there).
If it is not in the config, then you can not change it.
3rd Party addons
3rd party add-ons: (Not including mods with optional dependencies of KubeJS)
| Name: | Description | Links | Loader | Versions |
| Ponder for KubeJS | Make custom Create Ponder scenes with KubeJS. | Wiki CurseForge Discord Github | Forge |
1.18.2 |
| LootJS | A mod for packdevs to easily modify the loot system with KubeJS. | Wiki CurseForge Modrinth Discord Github | Forge & Fabric | 1.18.2 |
| MoreJS | A mod for packdevs to extend KubeJS with more events and utilities. | Wiki CurseForge Modrinth Discord Github | Forge & Fabric | 1.18.2 |
| ProbeJS | A typing generator mod to generate KubeJS typings. Enabling Intellisense for your KubeJS environments! | Wiki CurseForge Github | Forge & Fabric | 1.18.2 |
| KubeJS ComputerCraft | Adds support for KubeJS to add ComputerCraft peripherals to any block. | CurseForge Github | Forge & Fabric | 1.18.2 |
| KubeJS Borealis | Adds a form of "documentation" to the mod KubeJS using the mod Borealis | Example CurseForge Github | Forge |
1.16.5 1.18.2 |
| KubeJS TwitchIntegration | Cool twitch integration | Events Examples CurseForge Github | Forge |
1.16.5 |
| KubeJS: RTJC | A proof of concept add-on that allows you to compile and run Java code at runtime. | Description CurseForge Github | Forge |
1.16.5 |
| Kubejs Debug Adapter | A Debug Adapter Protocol implementation for KubeJS scripts. | Modrinth Github | Forge |
1.18.2 |
KJSPKG
KJSPKG is a package manager for KubeJS that can allow you to download different example scripts and libraries into your instance. It works with legacy versions, as well as KubeJS 6. More info on the new wiki.